The print settings in our Hospital Management System (HMS) application allow you to configure and customize the way documents are printed. This document will guide you through the various print settings options available and explain how to use them effectively.
Overview of Print Settings:
Print settings control the appearance and layout of documents when they are printed from the HMS application. By customizing these settings, you can optimize the printed output to meet your specific requirements.
To access the print settings, follow these steps:
Open the HMS application.
Navigate to the Grid as shown in the below image and Click on the "Administration"

and select "Clinic Settings" button located in the Left toolbar and then select " Print Settings" as shown in below image:
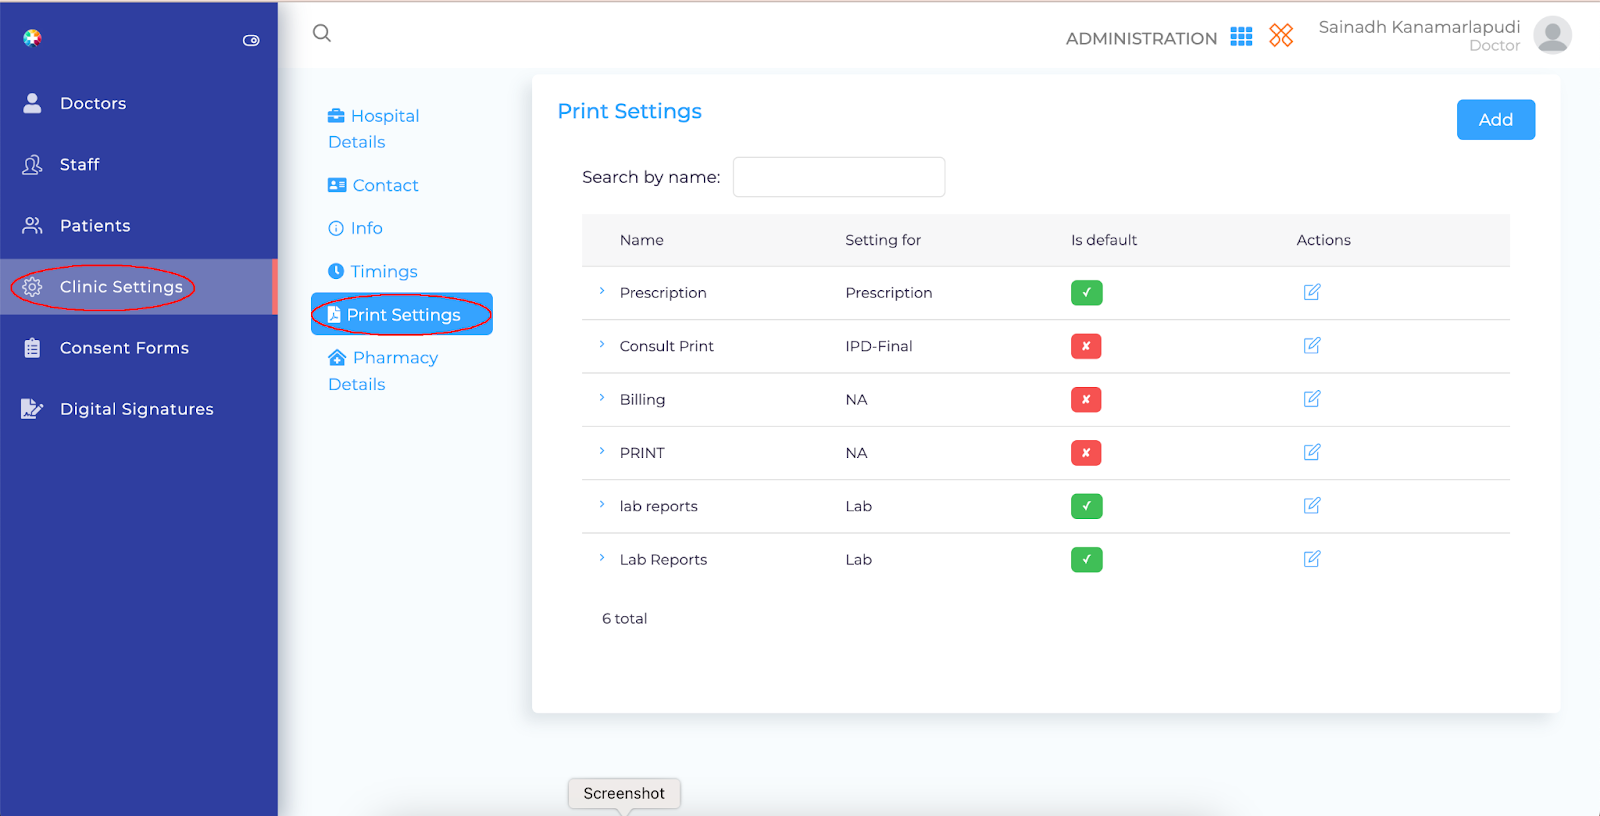
Print Setting Options
Choose the "Add" button located at the top right corner of the page to add print setting as desired by hospital

Write the name of the print setting in the "NAME" field before you add all details.
Margins need to be written in "cms" Top, Bottom, Left, Right, From the option "Setting For" Please select the above settings are suitable for which option as given in the below image and then select the save button to save your prescribed print settings.
To turn on the print settings as required please "IS DEFAULT" switch to toggle on & off
Fill the fields as required names given For Example find the below image:

To edit print settings please repeat the above process as same and then select the "Edit" action button as shown below in the image:

After entering into the edit settings screen need to edit for the required fields as mentioned in the below image:
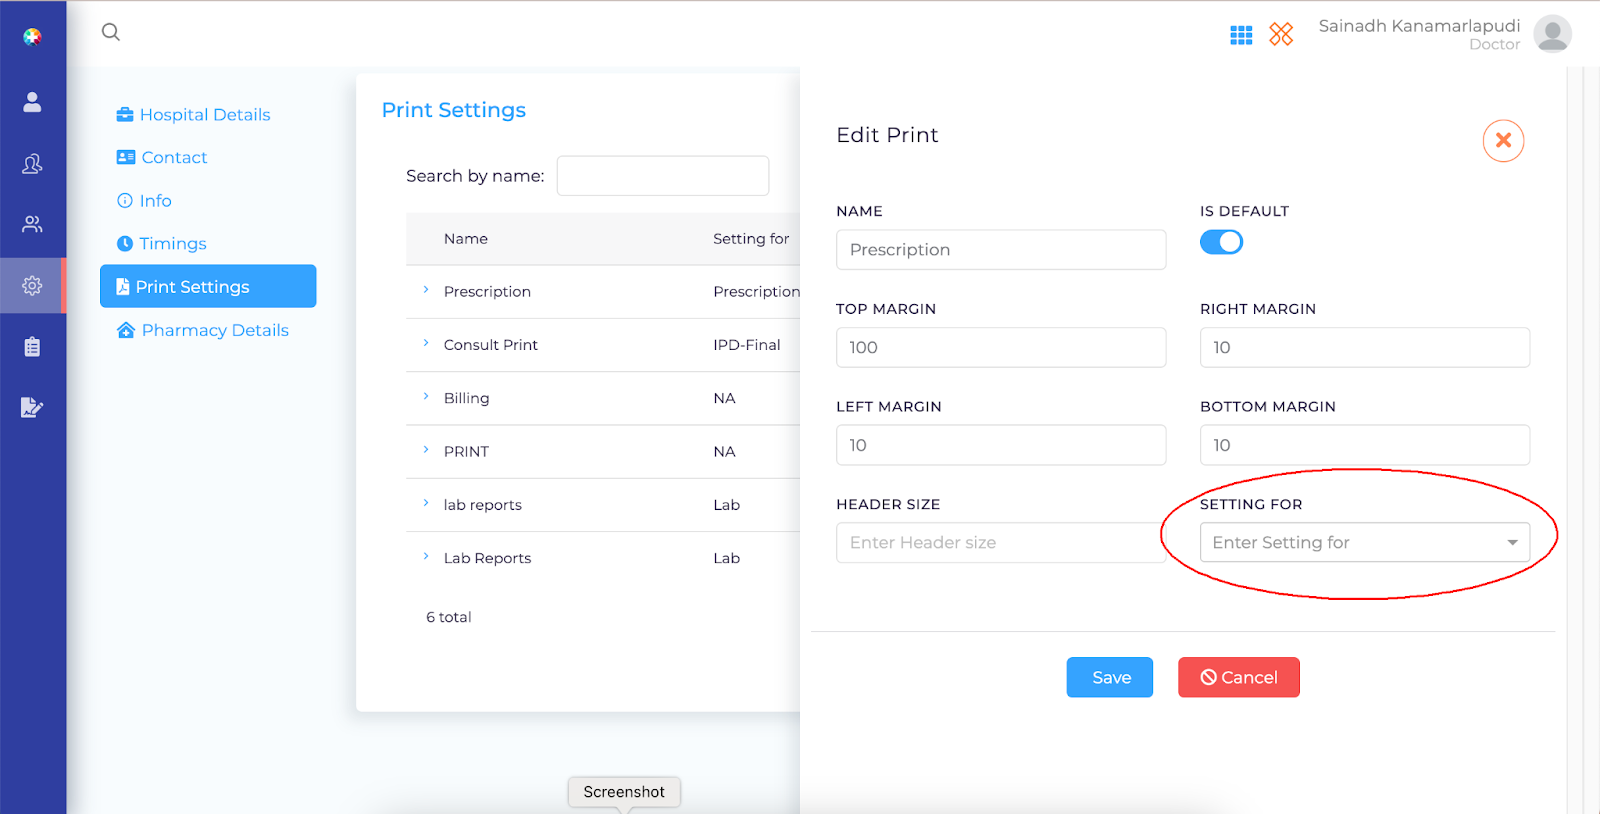
After editing the fields before saving you need to set the "SETTING FOR" and then select the save button to save your changes.