The pharmacy in our Hospital Management System (HMS) application allows you to configure and customize the way use of pharmacy. This document will guide you through the various pharmacy settings & options available and explain how to use them effectively.
Accessing Pharmacy
Pharmacy Settings
Bill
Item Masters
Vendors
GRN - List
Manage Stock
Stock Alerts
Lost & Found Report
Invoices - List
To access the"Pharmacy", follow these steps:
Open the HMS application.
Navigate to the Grid as shown in the below image and Click on the "Pharmacy"

After Entering into the pharmacy page there will be multiple options available on the left toolbar.As shown in the below image:
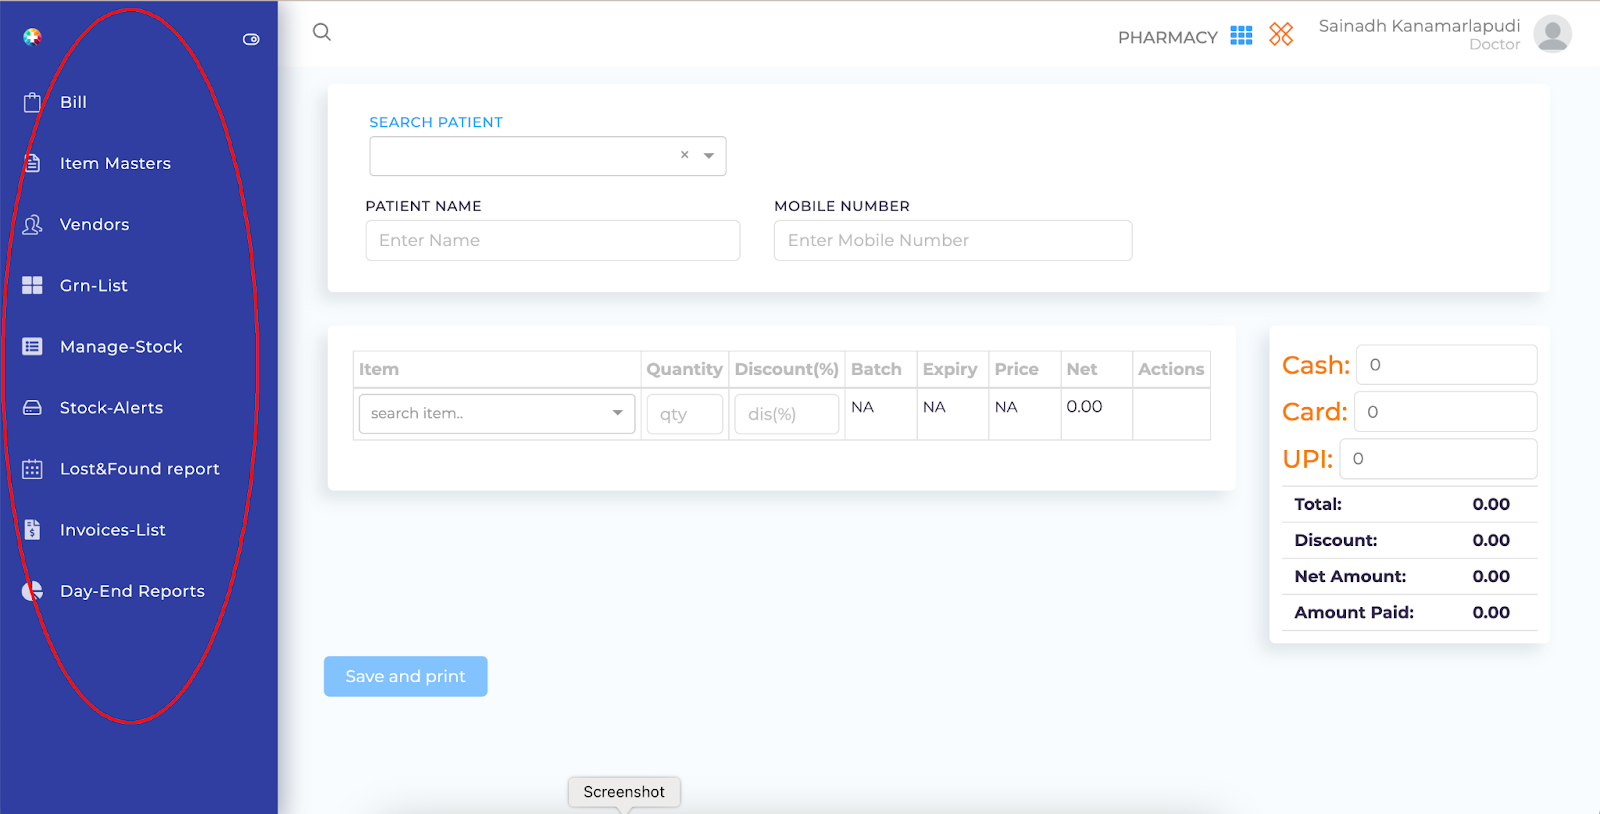
Bill
This option allows you to make bill and print billing need to fill the required fields as shown in the below image
After entering the details and medicines with all the details as shown below after that you need to enter the payment details as paid by the patient and then select the "Save and Print" button to complete the transaction
If the patient is existing in the hospital use "Search Patient" option to select the patient details if the patient is new to hospital can enter the details manually

Item Masters
Q: What are item masters?
A: Item masters where we can add all the medicines masters and can load from the existing master list
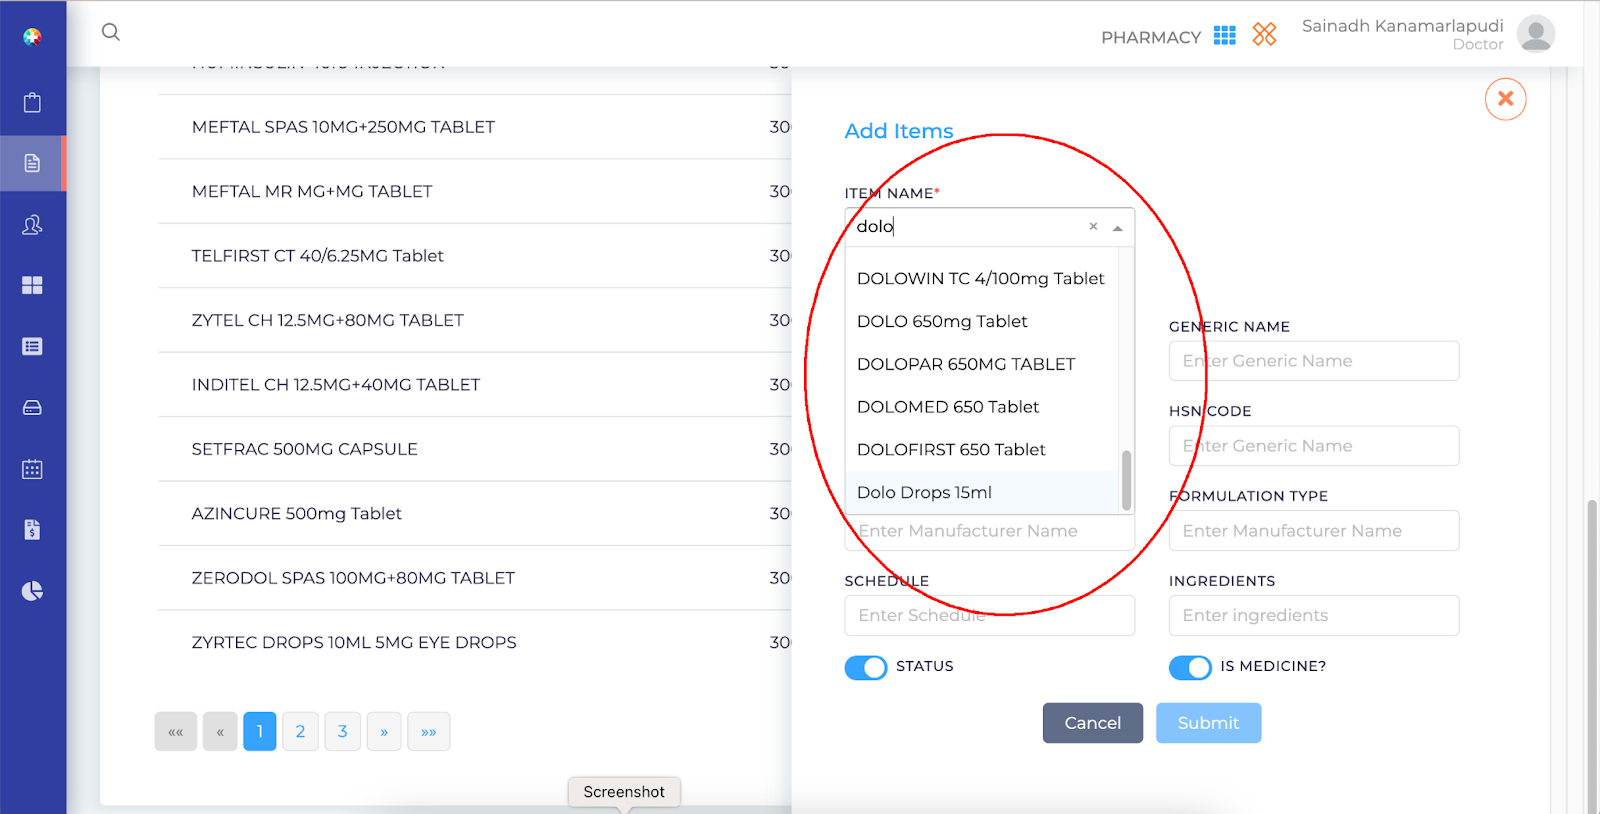
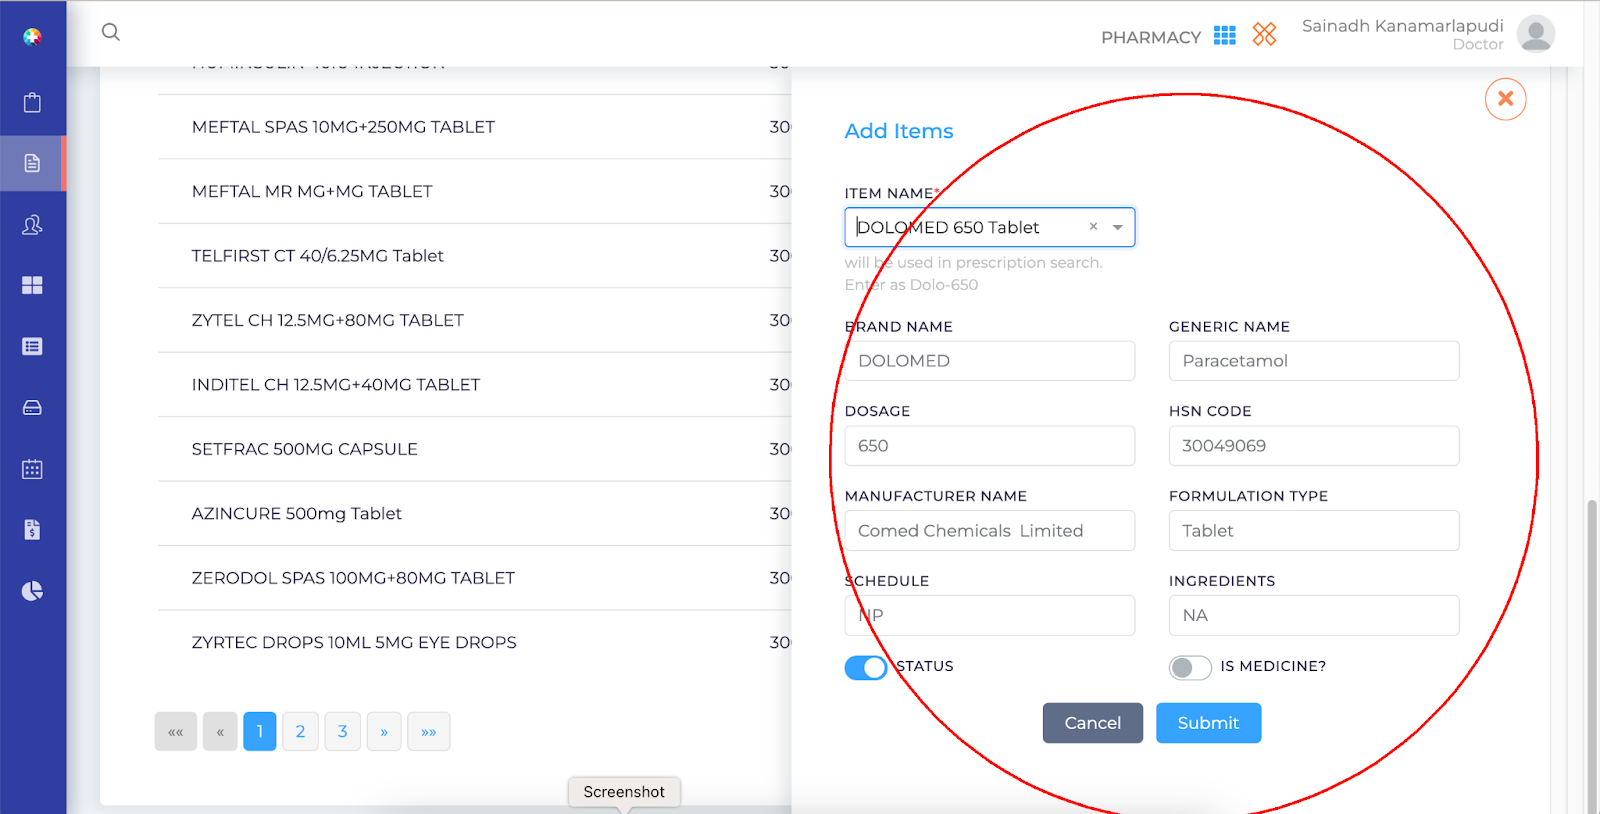
While coming to item masters here we need to add the medicine name and all the details which represents the medicine like, drug, Mg, Formulation type etc., and all
There is "Add Items" button located at the right top corner on the page select the button to load the item from the Master List if the item is available in master list all the fields will be pre filled if the item is not available from the master list you need to add all the fields manually and then toggle the "Status" On & toggle "Is Medicine" to On and then select the "SUBMIT" button to save the medicine
As shown in the below image:
Vendors
Q: What is meant by Vendors?
A: as a pharmacy we need to purchase stock the sellers are called as Vendors
In this we will learn how to add vendors and it will be used for us in updating the GRN-List which we will learn next
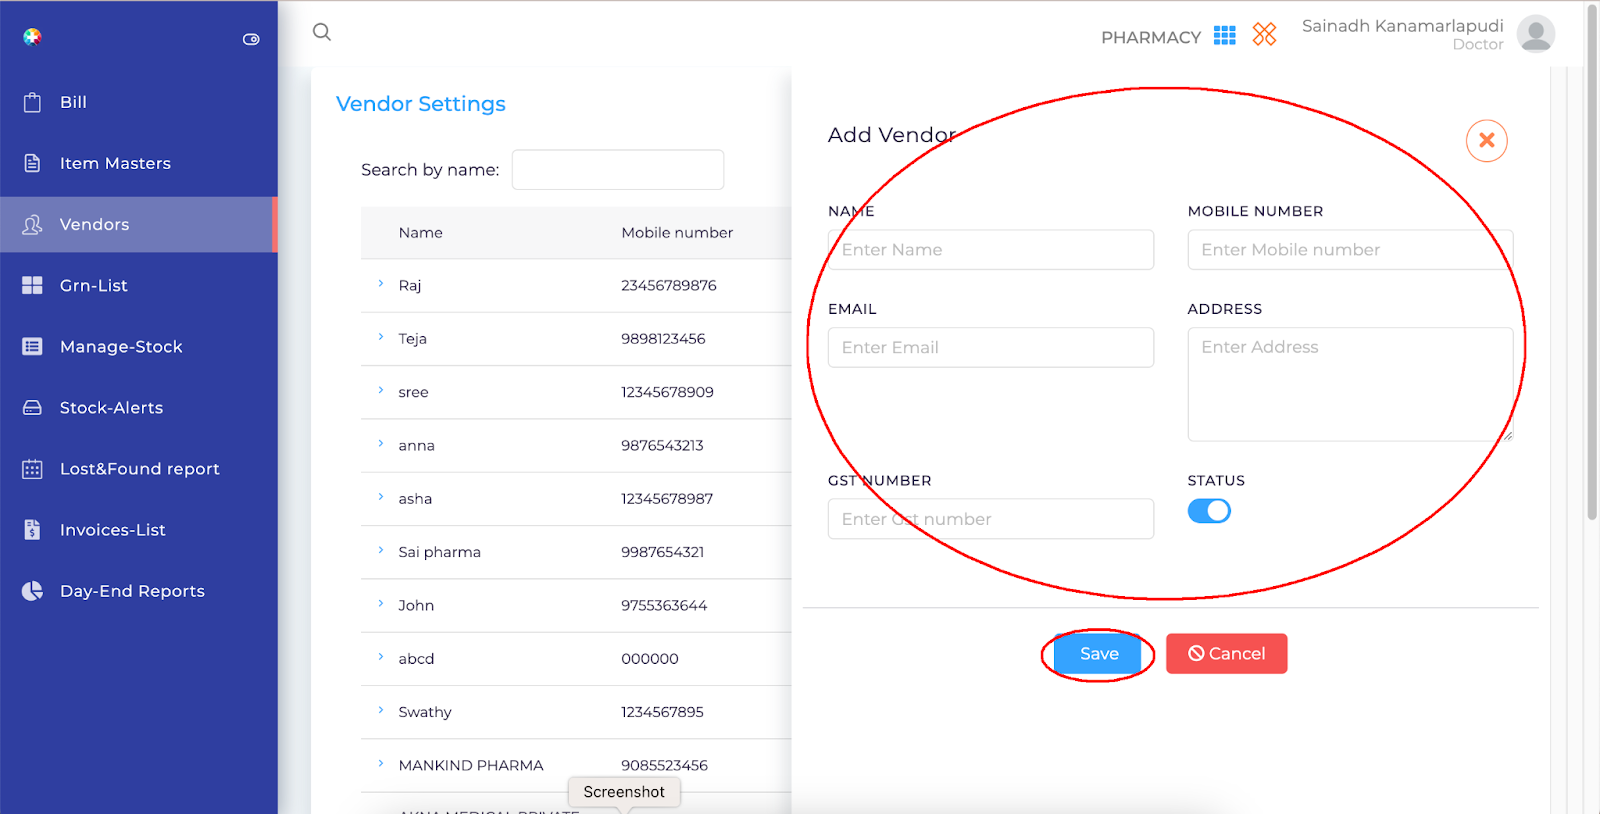
To add vendors need to select "Vendors" from left toolbar and need to select the "Add" button located at right top corner enter details as required and select the "SAVE" button to save the details to edit vendors details select "EDIT" action button
as shown in below image:

GRN - List
Q: What is GRN - List
A: GRN (Goods Received Note) is used for adding the medicines as the bill sent by seller / supplier to the pharmacy
To add GRN we need to have bill sent by seller / supplier handy after having it follow the above process to navigate to GRN - List then select "Add Grn" as shown in below image:

After Selecting "Add Grn" enter all the details as earlier we said load the vendor name which is added in vendors earlier and the all the details will be loaded as shown in below image:
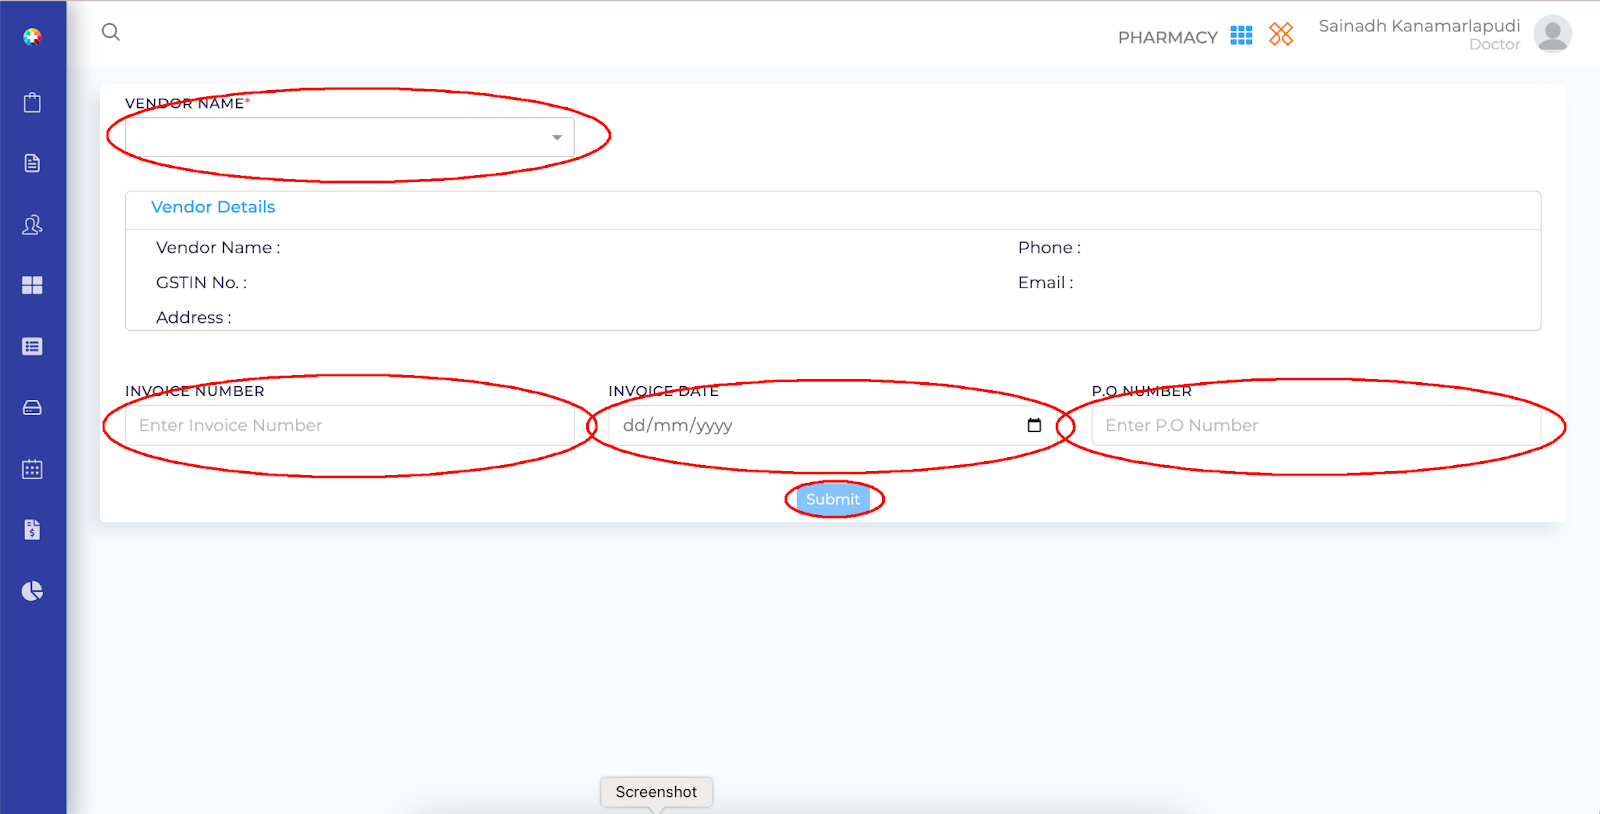
and then enter the other details like Invoice no, invoice date & P.O number, and then select " Submit" button to enter the GRN and entering to next screen as shown in the below image:
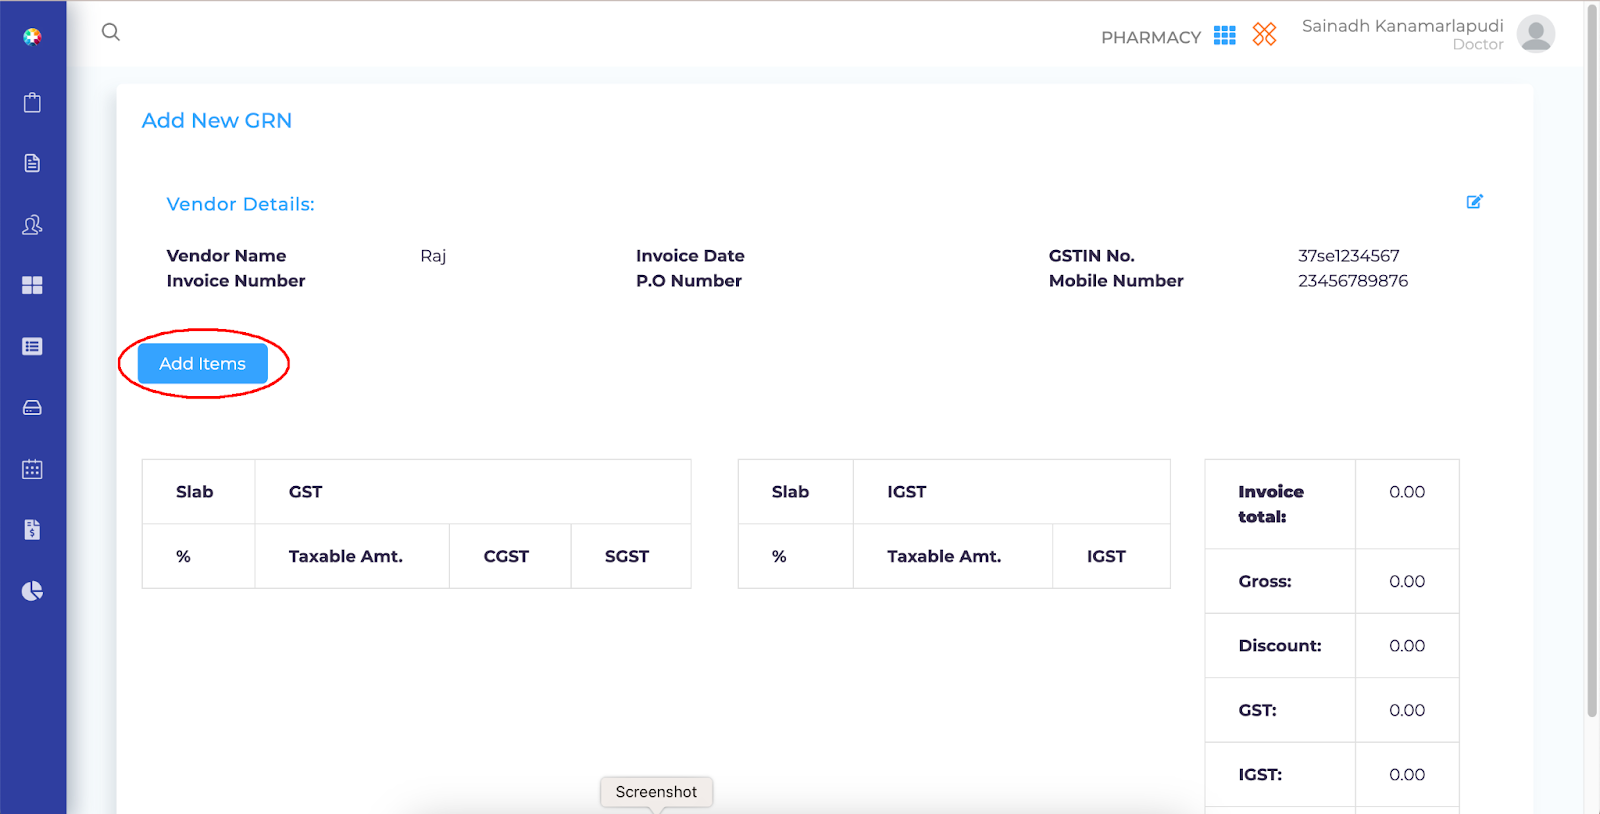
After that select "Add Items" to add the medicines and enter all the details as required as shown in the below image
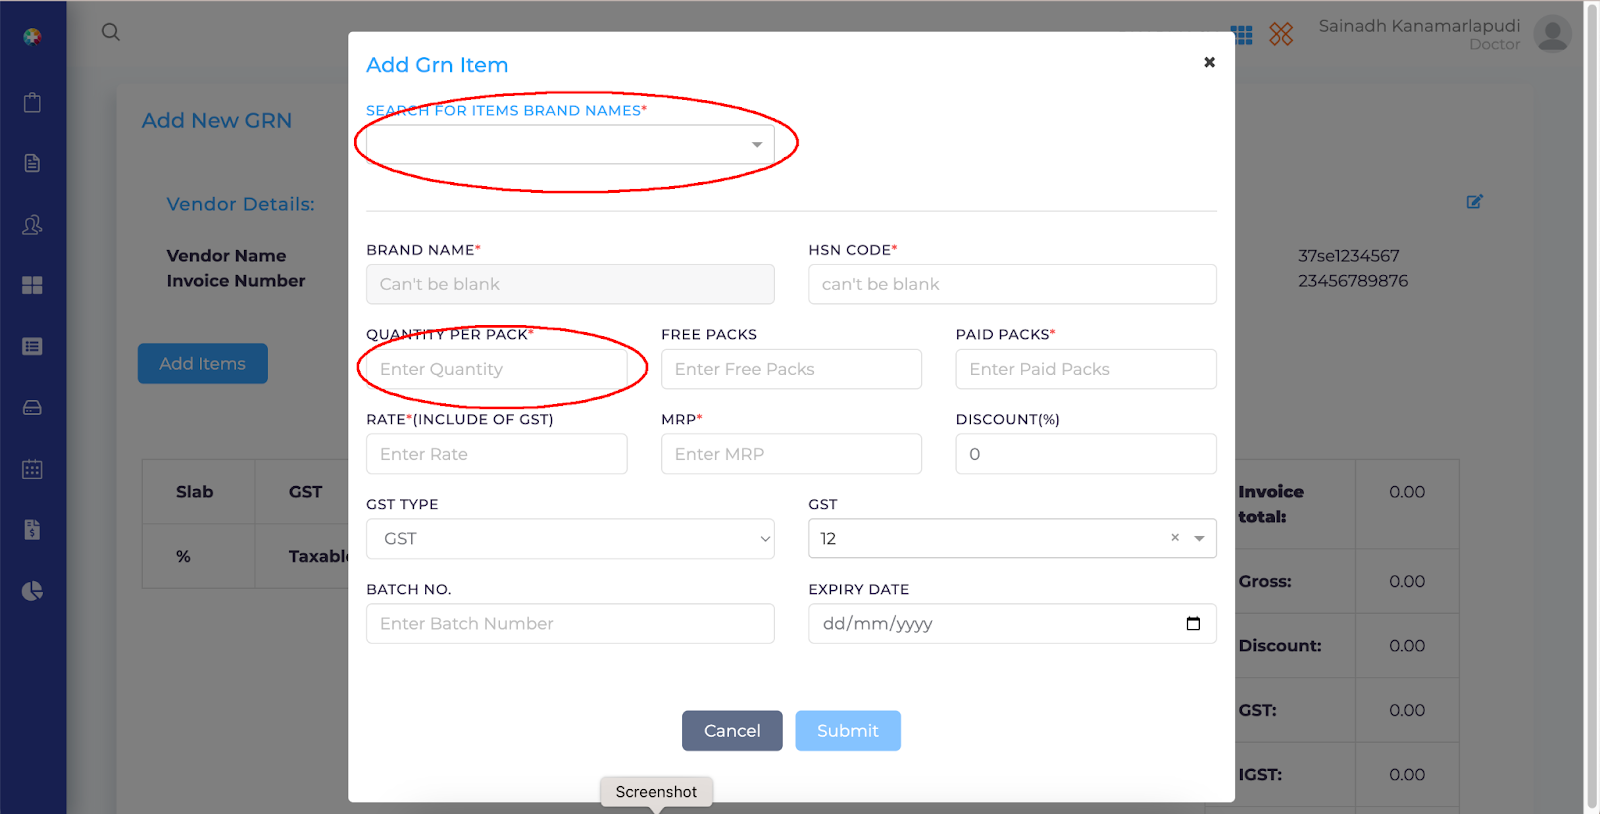

Enter the details in " ITEMS BRAND NAMES" and the medicines will load by searching their names from item masters list and all the details will be displayed need to enter balance details which are not present in the tab "Quantity Per Pack" we need to enter how many tablets are in the sheet and balance all as per the bill given by the seller / supplier and then select "SUBMIT" button to save the items to "GRN" after adding all the items to GRN then we need to select " Finalise GRN" as shown below:
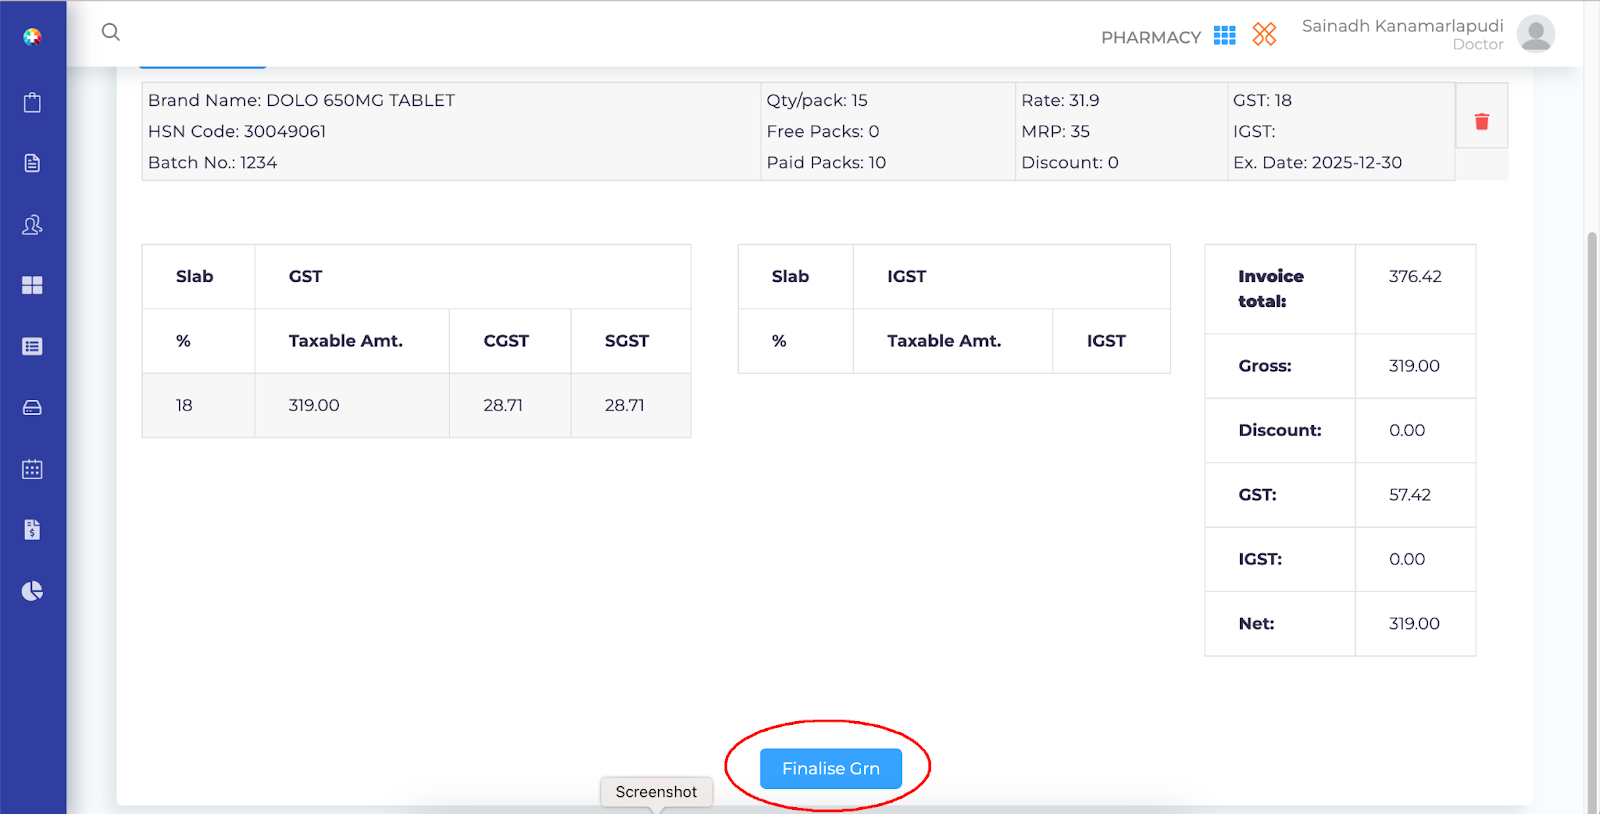
Cross verify before finalising the GRN and then select Finalise GRN once finalised cannot be deleted or revert back
Manage Stock
Follow the above process as said and navigate to manage stock located in the left toolbar as shown in the below image:
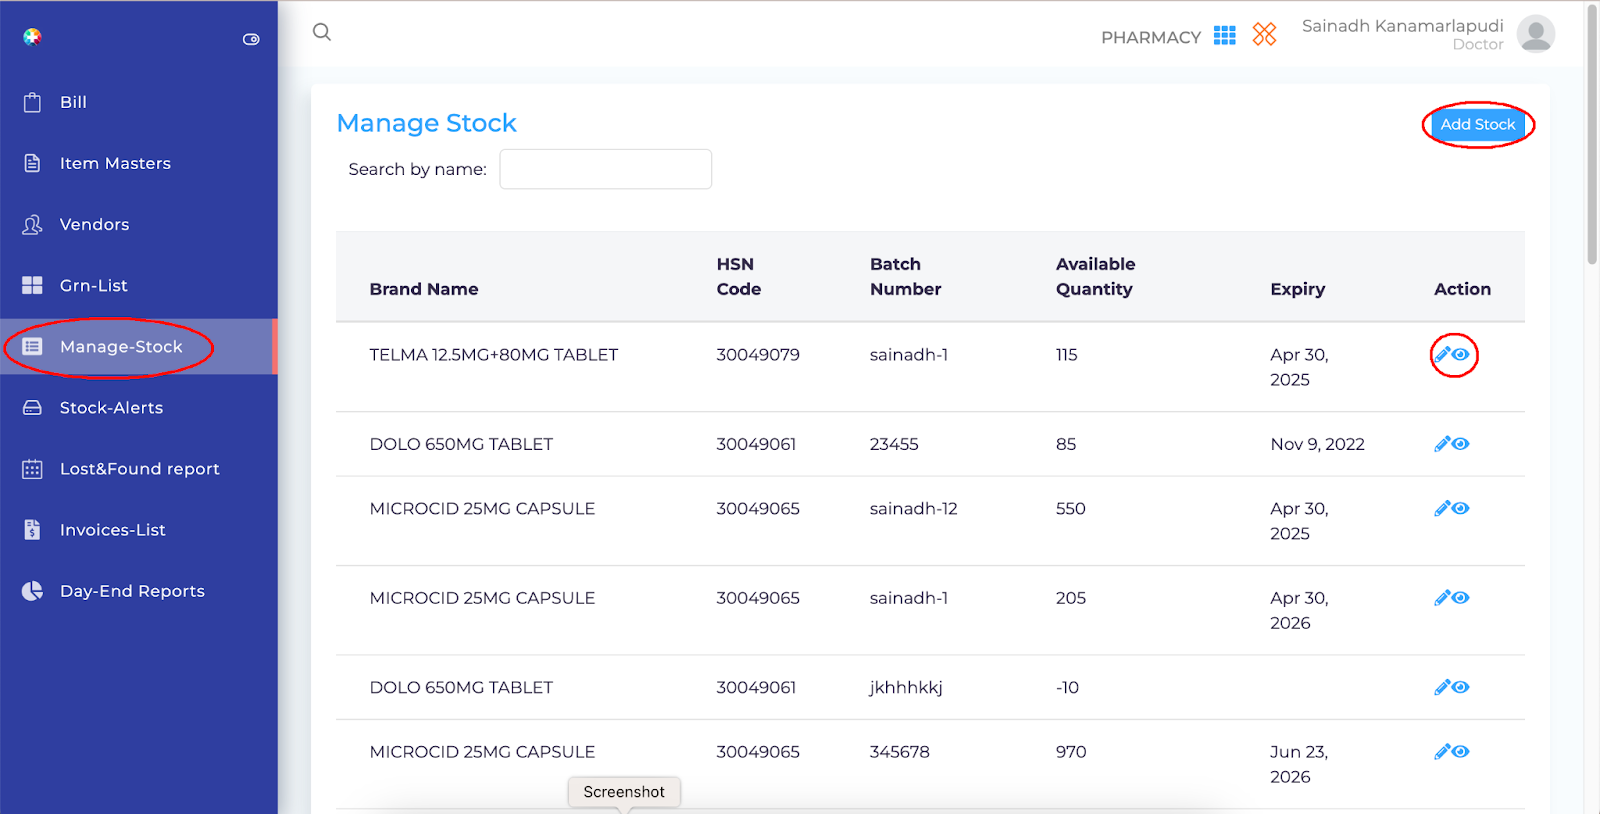
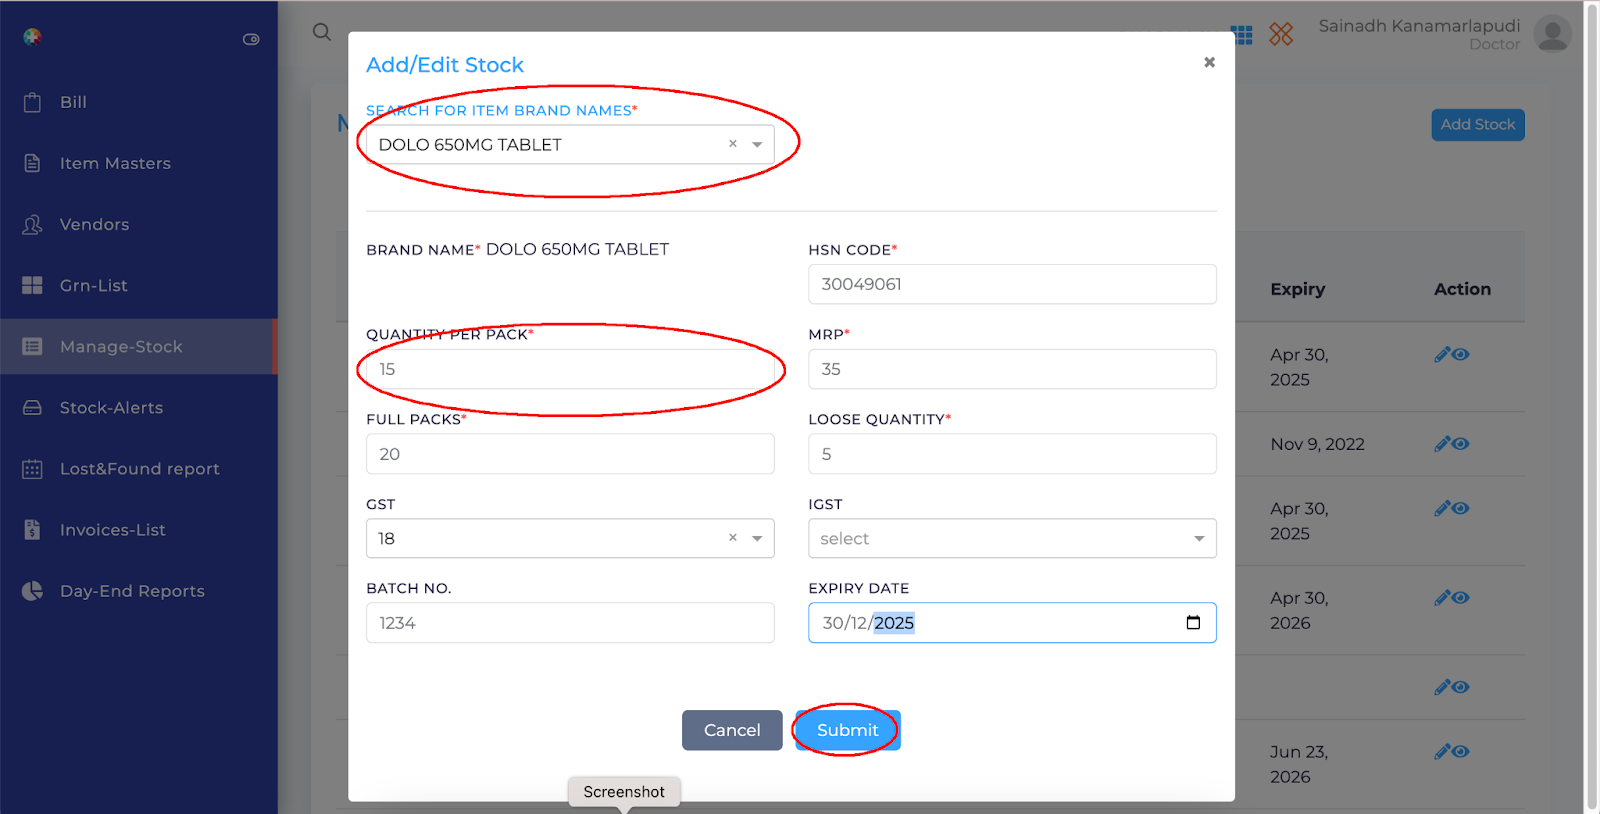
To add stock manually select " Add Stock" button as shown in the above image and will navigate to the next screen to add the stock and need to enter all the required fields and then select "submit" button to save the stock as shown in the below image:
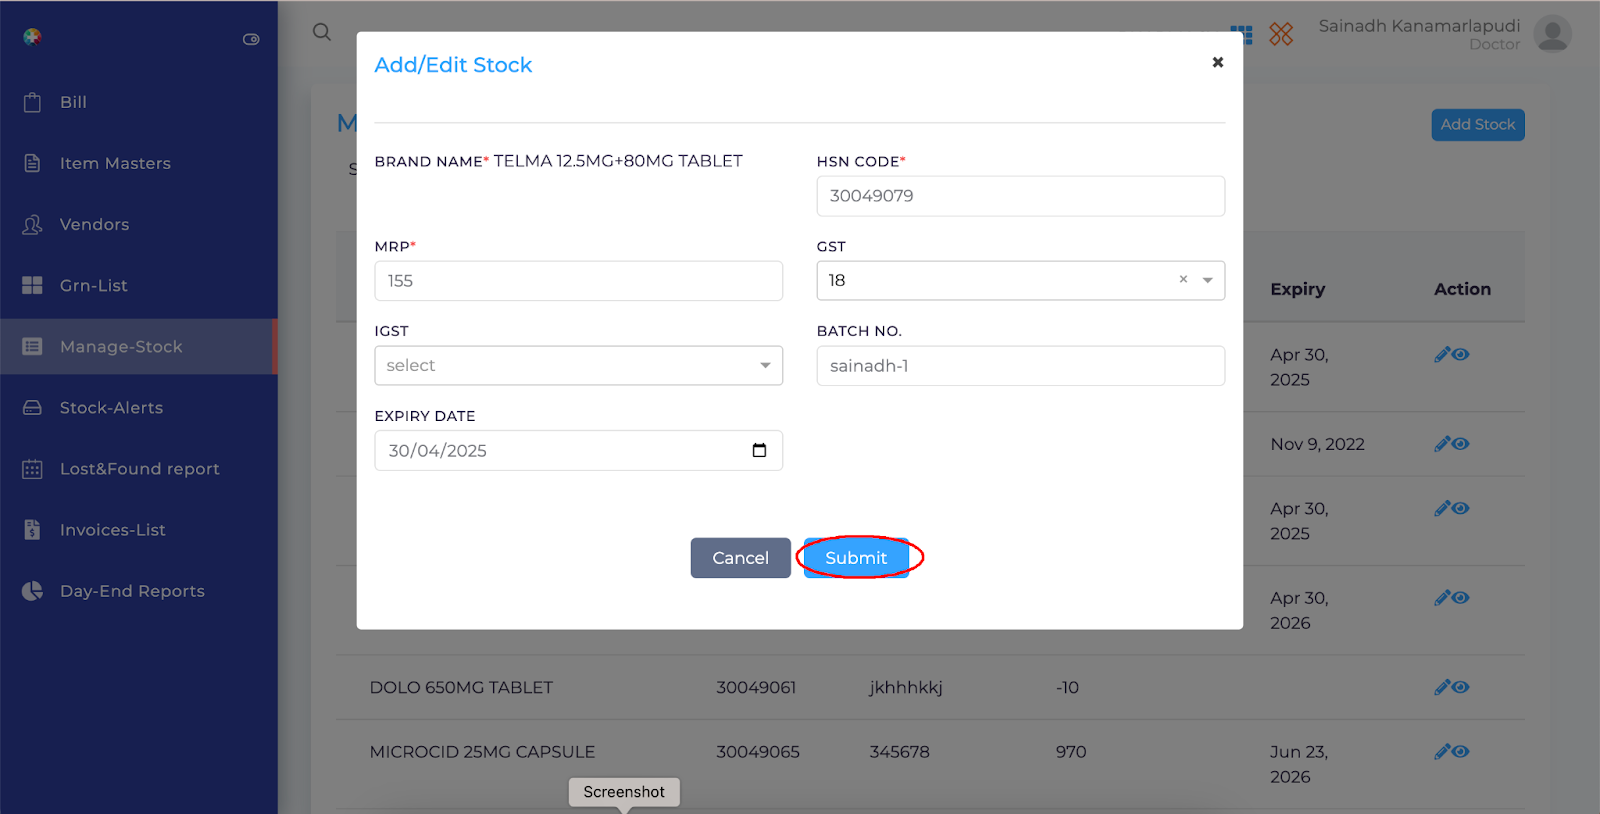
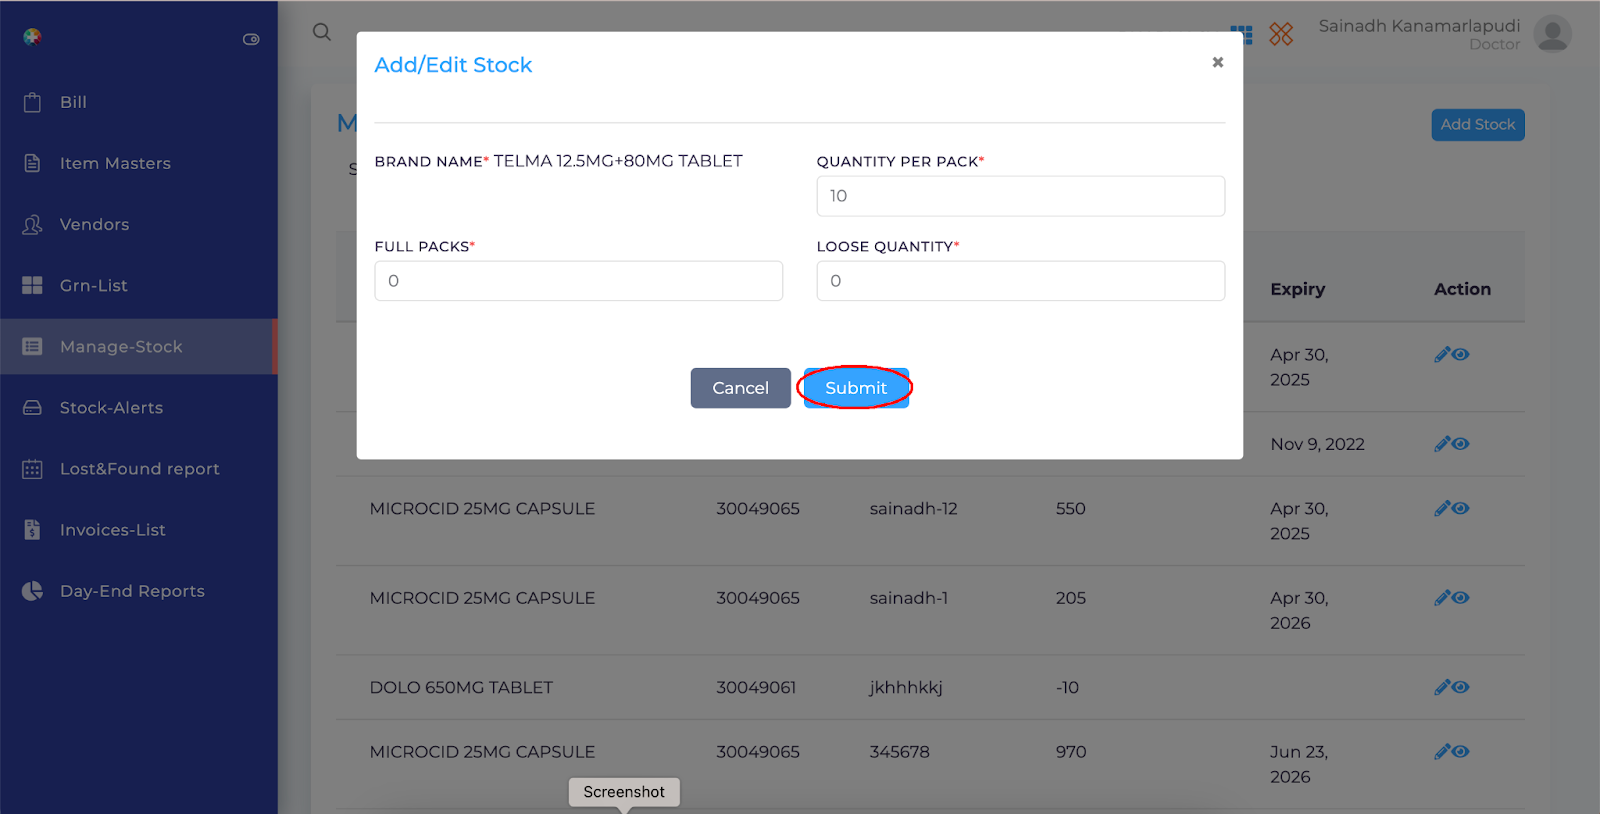
To edit the stock entered manually need to select the "Edit Symbol" as shown in the above image and will be navigated to the next screen to edit the required field as shown below image:
In case of any edits with other fields like QTY PER PACK, LOOSE QTY, FULL PACKS, need to select the "EYE SYMBOL" beside the medicine and will be navigated to the next screen as shown in below image:
Stock Alerts
Follow the above process and navigate to the "Stock Alerts" Located in the left toolbar and select here you will be able to find the stock that is nearby expiry dates you can use " Sort By" to easily sort according to the requirement so that is easy us to order / sale the stock depending on the expiry dates as shown in the below image:

Lost & Found Report
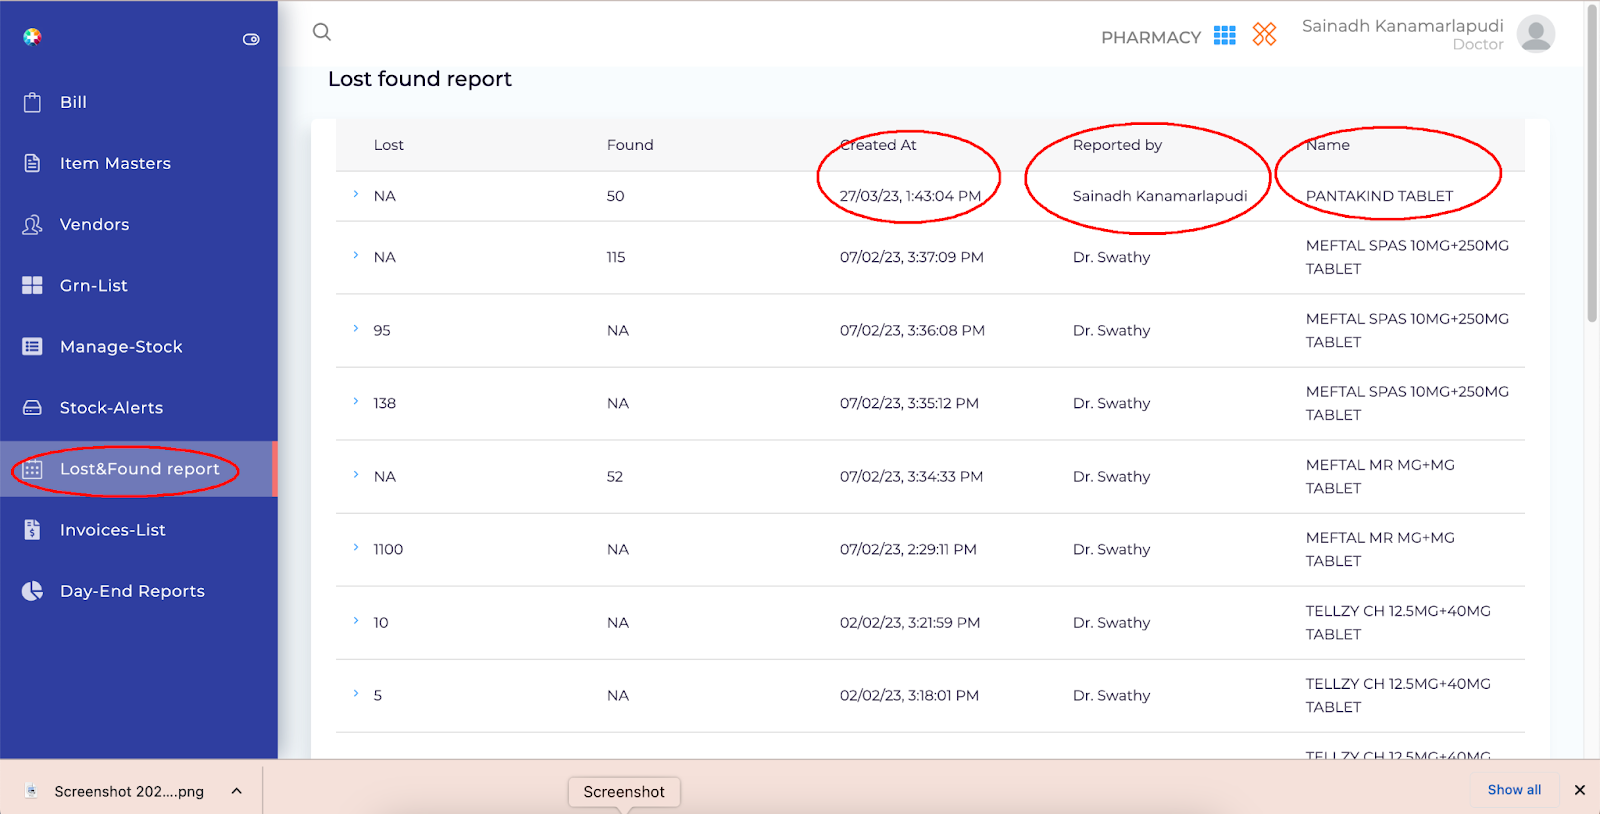
As explained earlier in the "Manage Stock" the Qty edited using the "EYE SYMBOL" located beside the medicine all the edited reports with medicine name, edited by,& Time with date will be shown in the "Lost & Found Report" Tab as shown in the bellow image:
Invoices - List
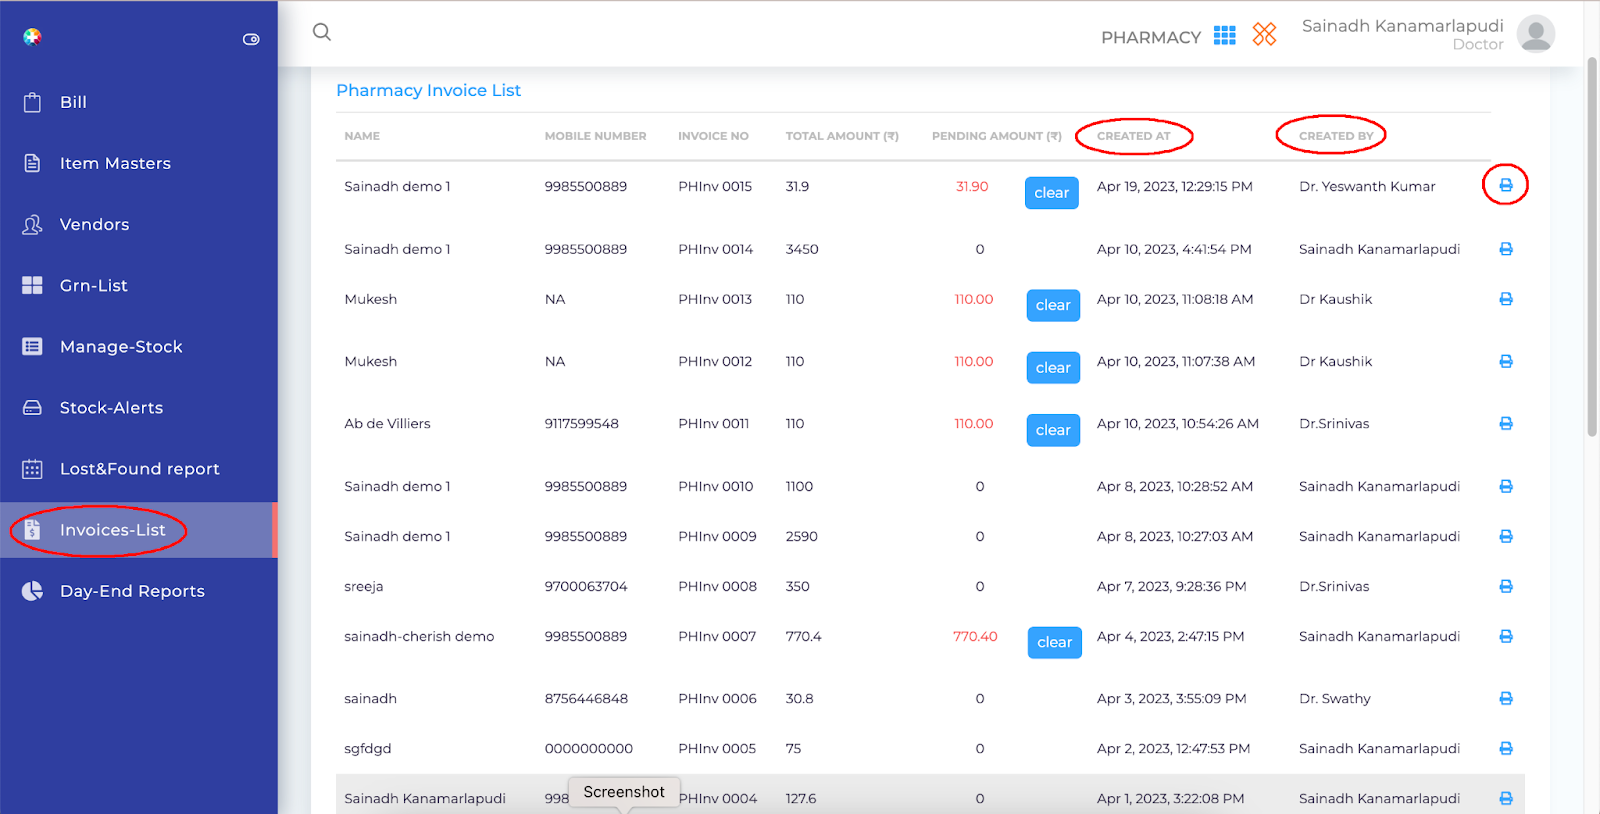
In the "Invoices - List" tab you will be able to find all the billed invoices with all the details mentioned and you can have a reprint of invoice if requested by the patient using "Print Symbol" as shown in the image below:
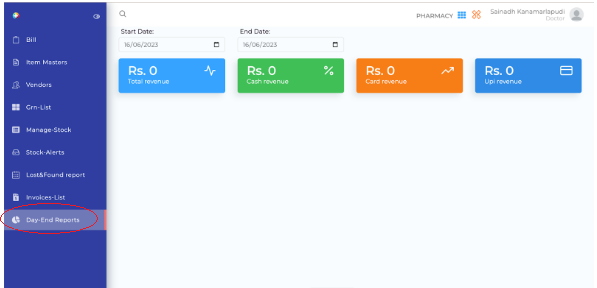
Day-End Reports
This Day–End Reports tab is helpful for the pharmacy cashier to calculate all the cash, card, & upi payments received for the day and received for the month using the date filter as shown in the below image: