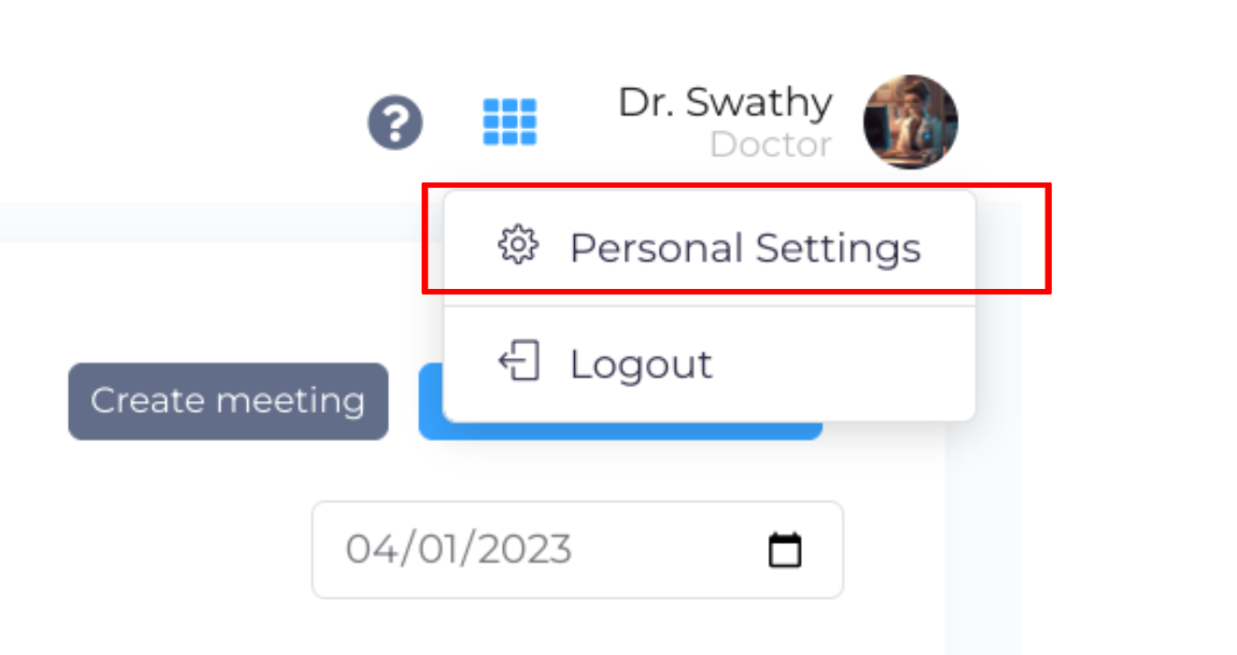
Personal settings are an essential aspect of the doctor's account in the software. These settings can be accessed by clicking on the "Profile" option located at the top right corner of the screen.

The personal settings navigation bar on the left side of the screen consists of three options - Personal Profile, Blogs, and Templates.
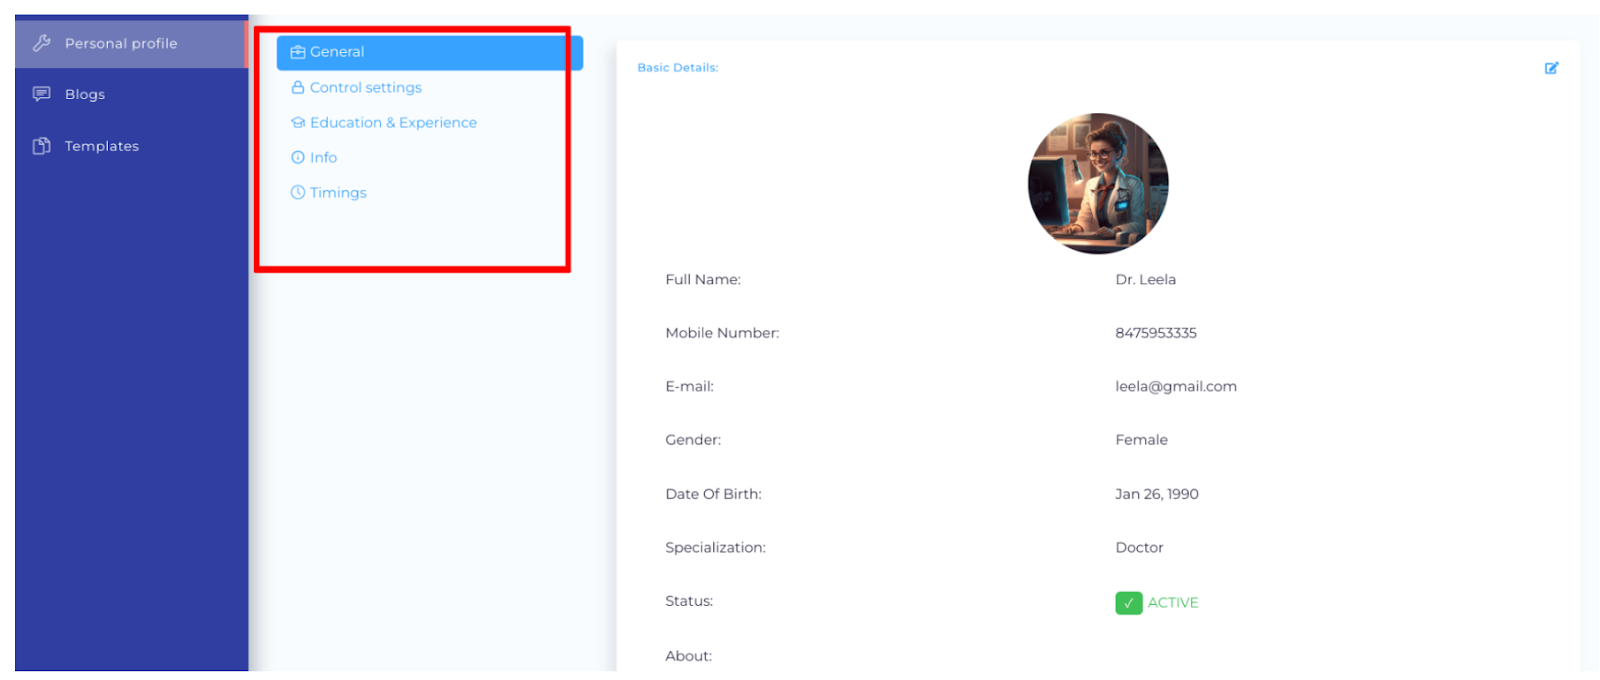
Under the personal profile option, you can manage your general and control settings, education and experience, awards, additional links, social network links, and timings.
General:
The General section includes the doctor's basic information. It is essential to keep this information up to date for efficient communication with patients. A complete and accurate profile can also help patients find the doctor they need more easily as it gets indexed on google.
Click on the edit icon on the top right corner to edit the general details.
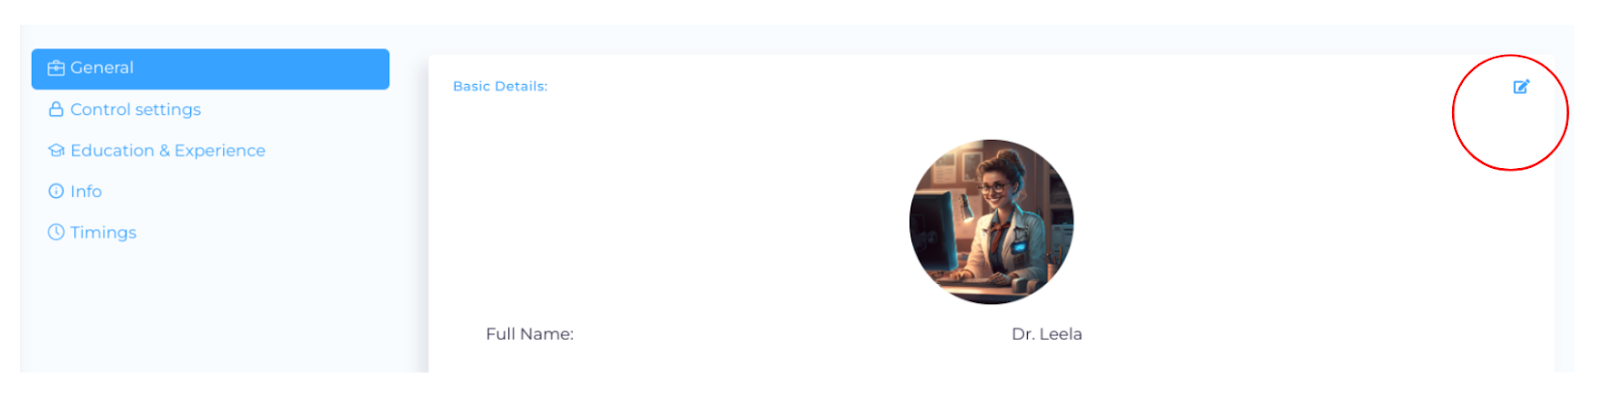
Profile Picture: You can upload your profile picture for patients to identify you. Hover on the profile image area and click on the edit icon.
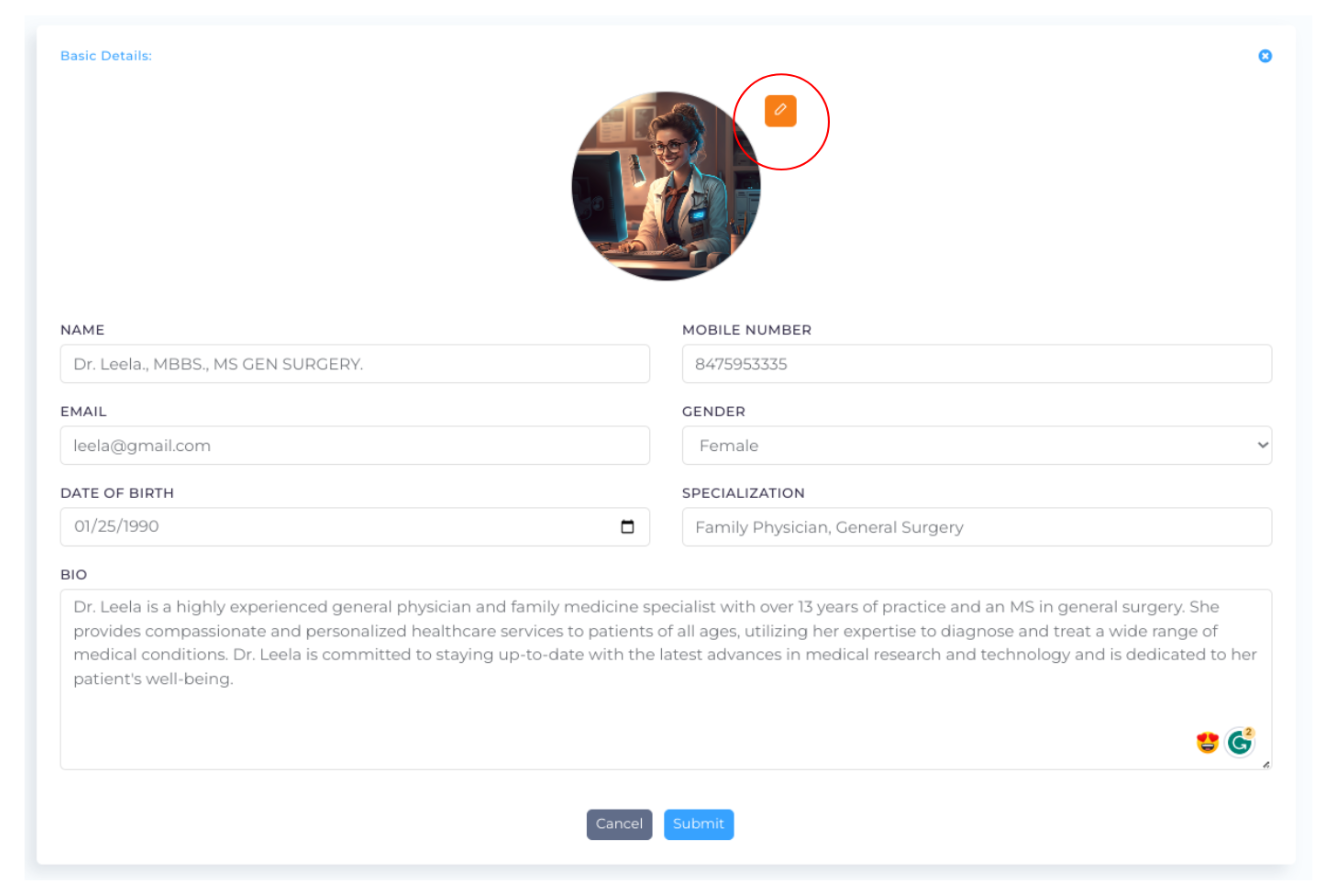
Full Name: Add your full name as you want it to be displayed on the website.
Mobile Number, Email ID: These details are compulsory fields to login to the profile.
Gender, DOB: This is for the organisation's record.
Specialisation: Add your area of specialization as you want it to be displayed in the website.
Bio: Write about yourself in detail. This will be displayed on your profile and will also be used for organic reach.
Control Settings:
Control settings allow doctors to change their password, update their consultation price, IP consultation price, EMR type, registration number, and registration council. It is important to keep these details current for proper billing and record-keeping purposes.

Change Password: The admin creates the profile password when creating the profile. It can be changed here after logging in to the profile.
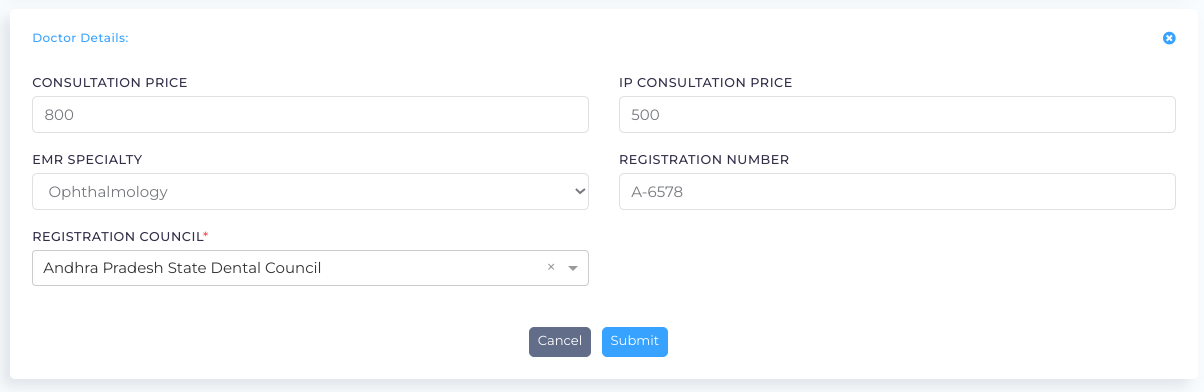
Doctor Details: Click on the edit icon on the top right corner to add/edit your consultation price, IP consultation price (if the doctor has access to the IPD module), EMR type, registration number (mandatory), and registration council.
Please note that there are currently three Electronic Medical Record (EMR) pages available on our platform: the default EMR for general practitioners, as well as specialized EMRs for dental and ophthalmology practices. We are continuously working on developing additional EMRs to serve more medical specialties in the future.
Education and Experience:
The Education & Experience section includes a doctor's education and work experience, as well as any awards they have received. This information helps patients assess a doctor's qualifications and experience. This information can provide a comprehensive profile of the doctors for their patients to refer to.
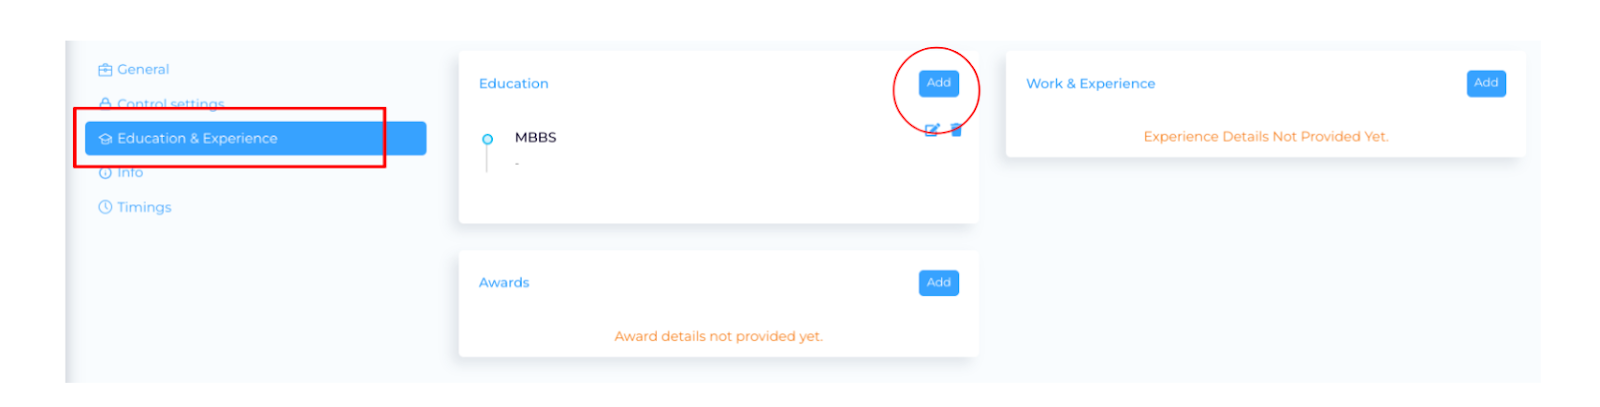
Education: Add your educational qualifications here.
Work and Experience: Mention your work experience and history here.
Awards: You can add your awards and recognitions here.
Info:
The Info section includes additional links, social network links, and languages spoken by the doctor.

Additional Links: Additional links can be used to share research papers, publications, or any other work-related information.
Social Network Links: Social network links can be added for patients to easily find a doctor's professional or personal pages.
I can speak: Add the languages you know here. This section can help the patients make informed decisions.
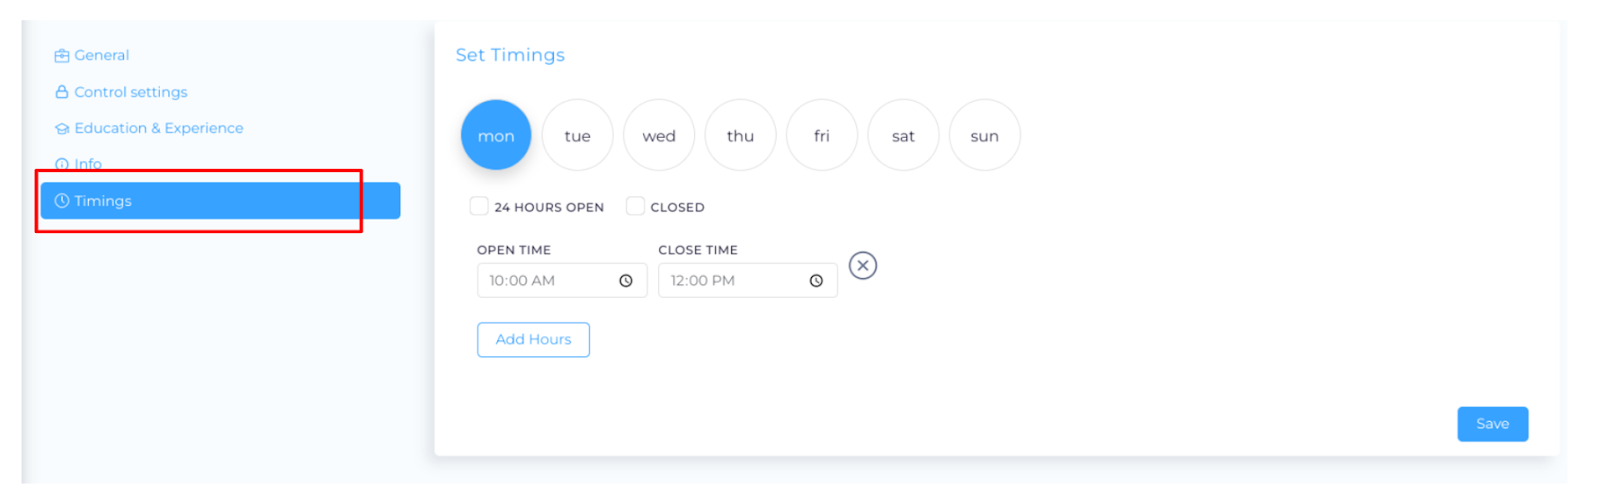
Timings:
The doctor can add their weekly schedule here. This will be displayed on the doctor's profile, and patients can refer to it before booking an appointment.
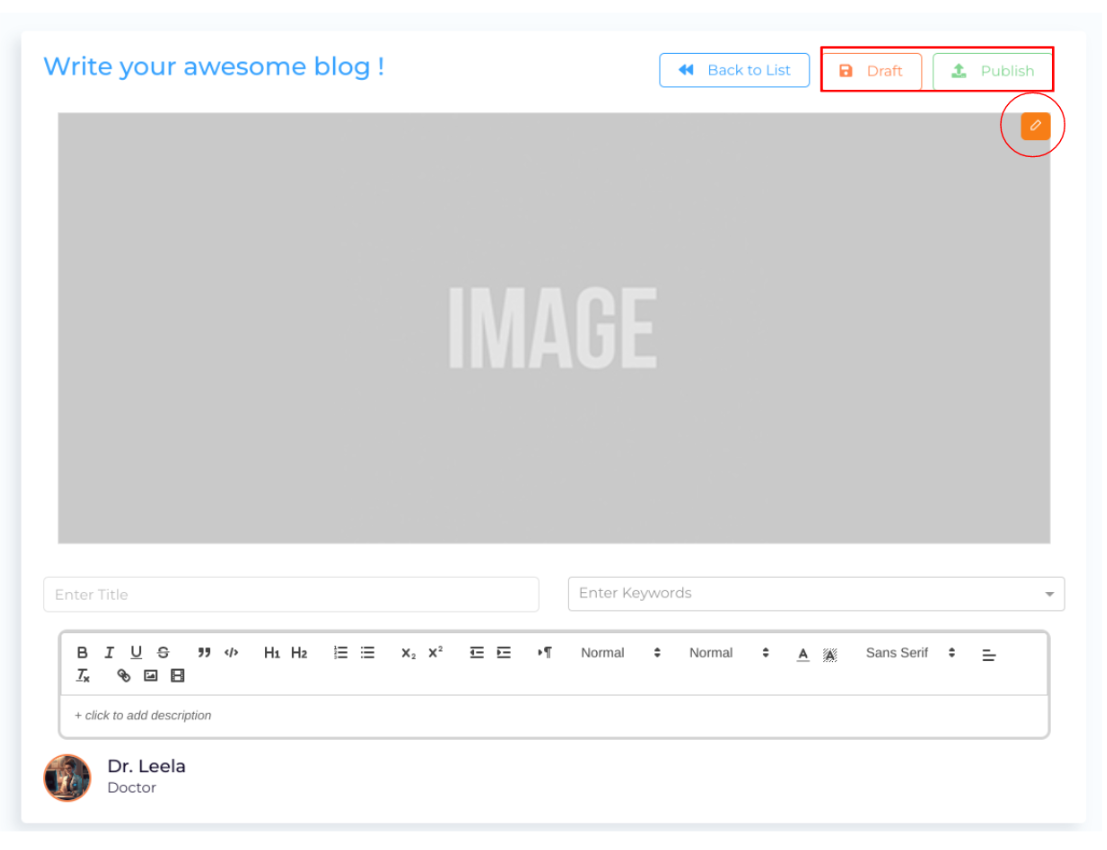
Blogs are a great way to talk about your observations, achievements, and other topics. Only doctors can access and write blogs from their personal settings. The organization cannot write a blog. Under every blog published on the website, the author's name is mentioned. Blogs are indexed and help with organic SEO.
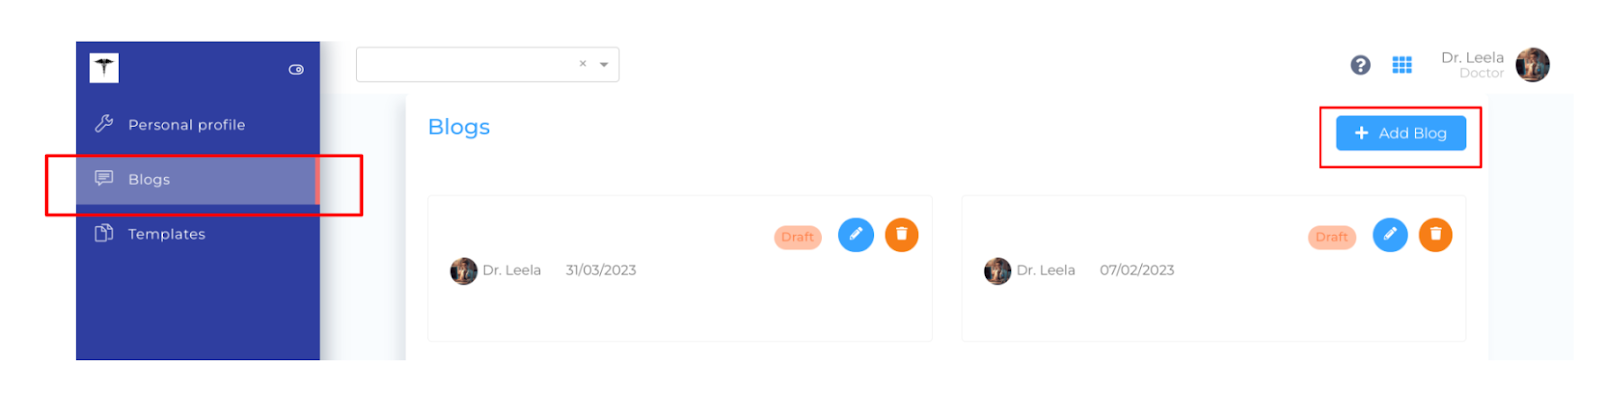
To write blogs, click on the "+ Add Blog" button located in the top right corner. A blog window opens, and you can add a title, keywords, description, and an appropriate image. You can publish the content if satisfied, or save the blog as a draft if you are unsure and want to visit it later.
Modify/delete Blogs:
Only individual doctors have the ability to create and publish blog posts, and they cannot be modified or deleted by the admin or any other user. This ensures that doctors have full control over the content they publish, and prevents unauthorized modifications or deletions.
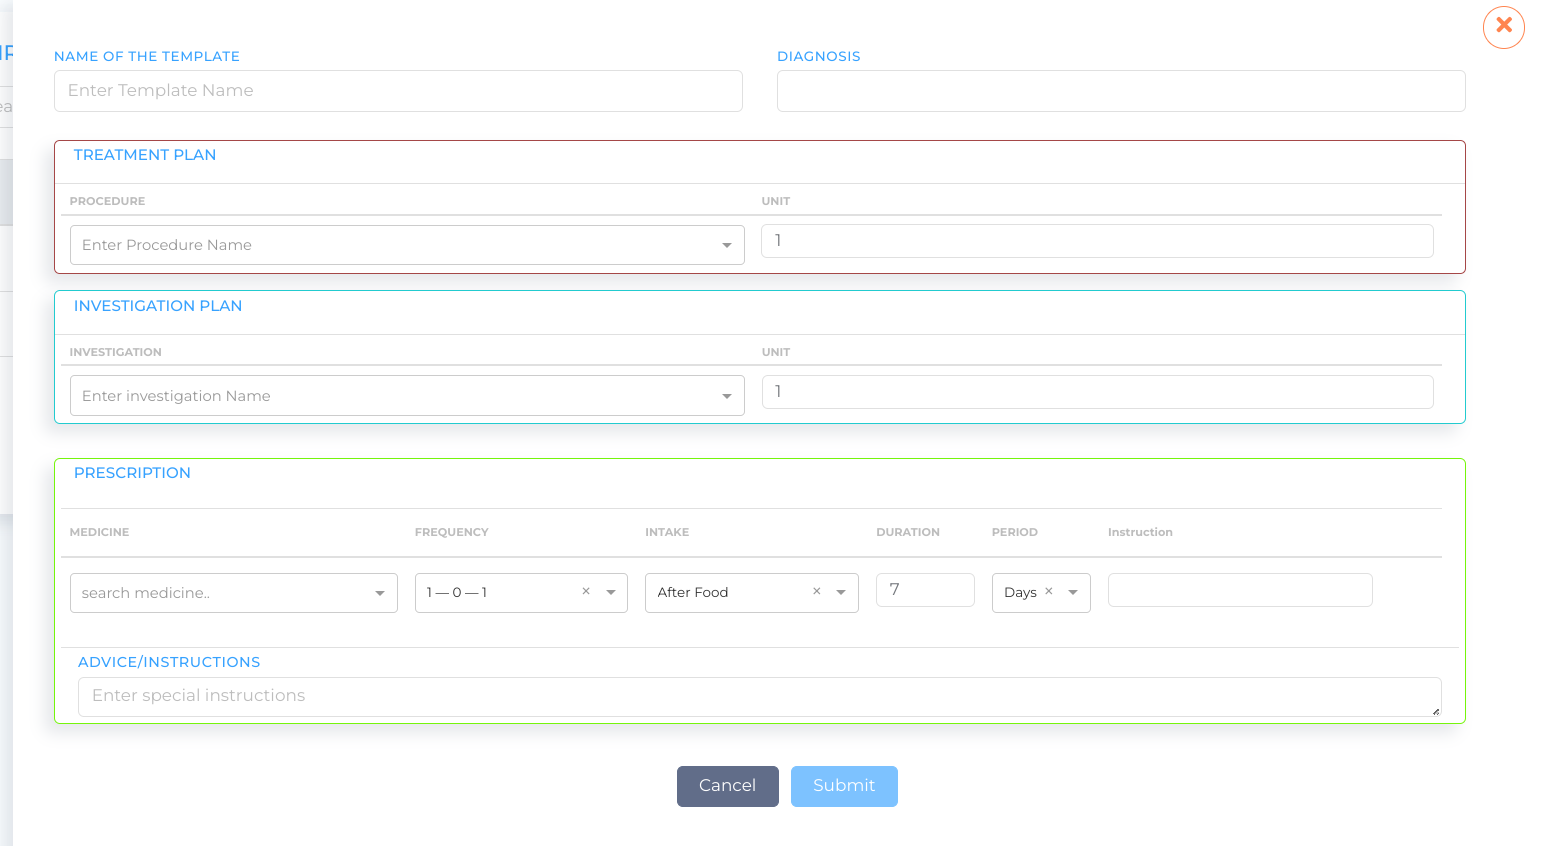
Templates are a part of the EMR and can be used if there is any repetition in the doctor's consultation or any part of the prescription that is frequently used.
Add/edit Templates:
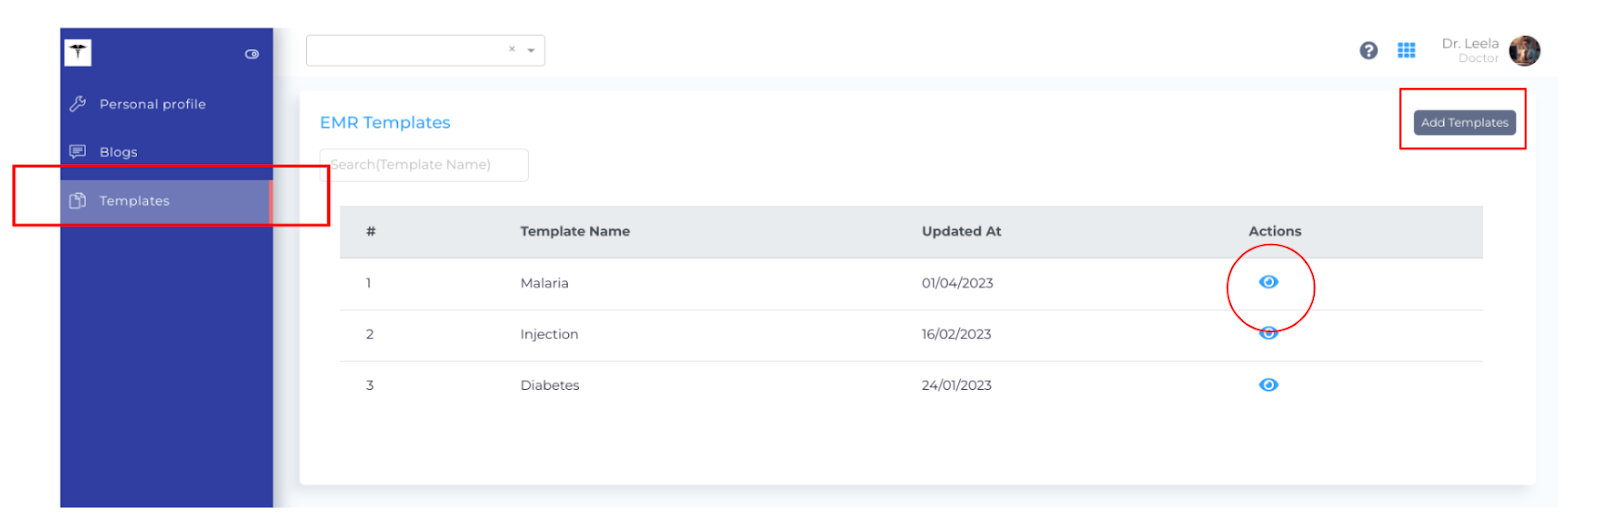
Templates can be created by filling out the template form by clicking on the "Add Template" option in the top right corner. Once you have added all the required fields, click on "Submit." Click on the "edit icon" under actions to edit the existing template.
Templates are personalized and exclusive to each doctor, and only accessible through their personal settings. They can be used from the OPD module's prescription page to save time and improve efficiency. It's worth noting that the admin cannot access, view or edit the templates, ensuring the doctor's confidentiality and privacy.
In the Personal Settings section for users, there are two main categories: General and Control Settings.

General:
In this section, users can enter their name, DOB, gender, email, and mobile number, for identification and login purposes. They can also provide an about section to share basic information about themselves.
Control Settings:
This section enables users to change their password for added security.
However, it is important to note that users do not have access to blogs and templates, as these features are specifically designed for doctors.
Note: It's important to remember that the user's personal settings are private and not visible to others.