The Administration module is a key component of NeftX's Hospital Management System. It is designed to provide hospitals and clinics with the tools they need to manage various aspects of hospital operations efficiently. With the Administration module, users can create and manage user accounts, define roles and permissions, and set up the organizational structure of the hospital or clinic.
To access the Administration module of NeftX, users need to log in to their account on the subdomain "slug-name.hms.neftx.com". Once logged in, they can navigate to the Administration module from the main menu in the top right corner.
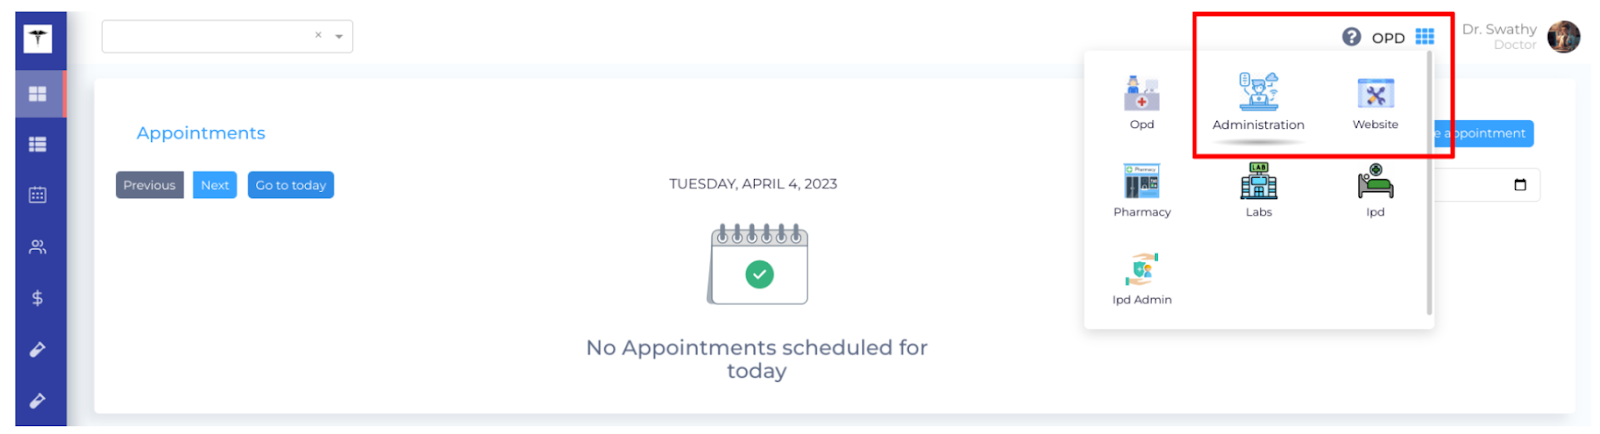
The administration module has 6 sections. These sections can be accessed from the navigation bar on the left.

1. Doctors
2. Users
3. Patients
4. Clinic settings
5. Consent forms
6. Digital signatures
This section allows administrators to manage all the user accounts associated with the hospital or clinic. Administrators can create new user accounts, edit user details, and deactivate user accounts as needed. They can also assign roles and permissions to user accounts to control access to the various modules of NeftX.
Add New User
Click on the "Add" button on the top right corner of the page.

Fill in the details of the users in the form provided.
Assign roles to the user for the different modules in HMS.
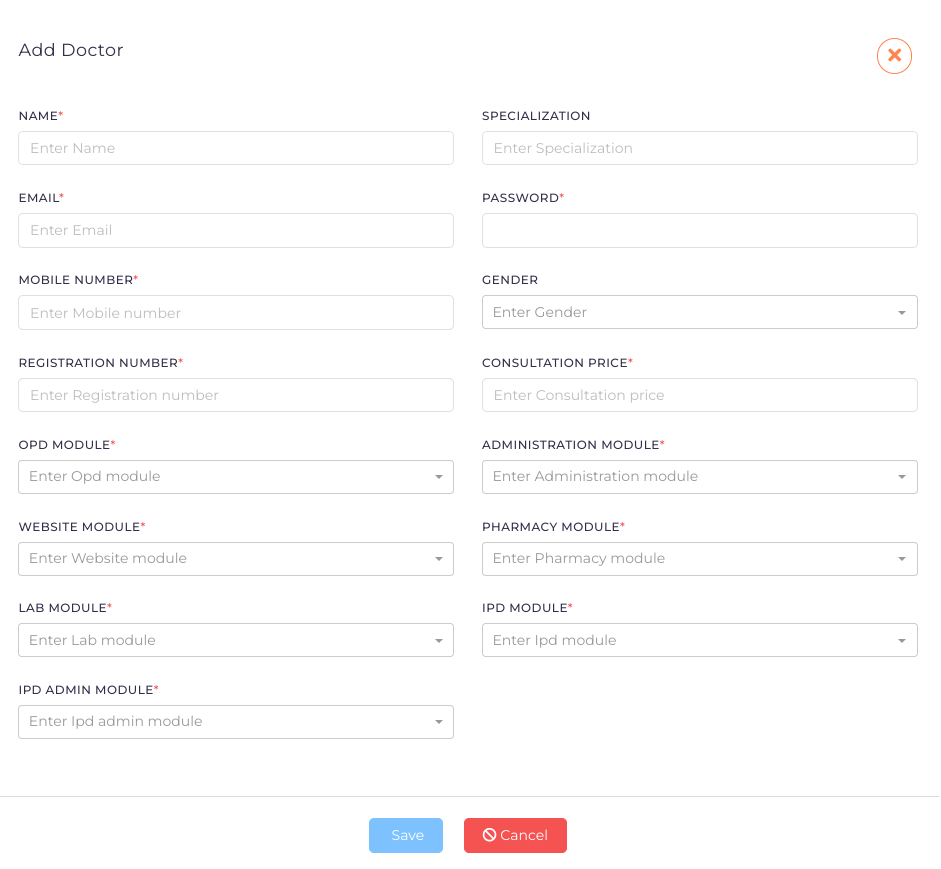
Save the new Doctor/Staff details.
Note: Additional fields for the doctor include specialization, registration number, and consultation price, while these fields are not present for staff members. This differentiation is intentional and designed to ensure that our application meets the unique needs of our users.
Edit User Profile
The edit option for user profiles will lead to the user's personal profile view. However, edit access is only granted to admins of this module. In the event that a doctor does not have the time or resources to update their profile, an admin can assist in making necessary changes. This feature is designed to ensure that all user profiles are accurate and up-to-date while minimizing the burden on individual users.
Locate the Doctor/User's profile from the list view provided.
Click on the "Edit" button under the "Actions" column.
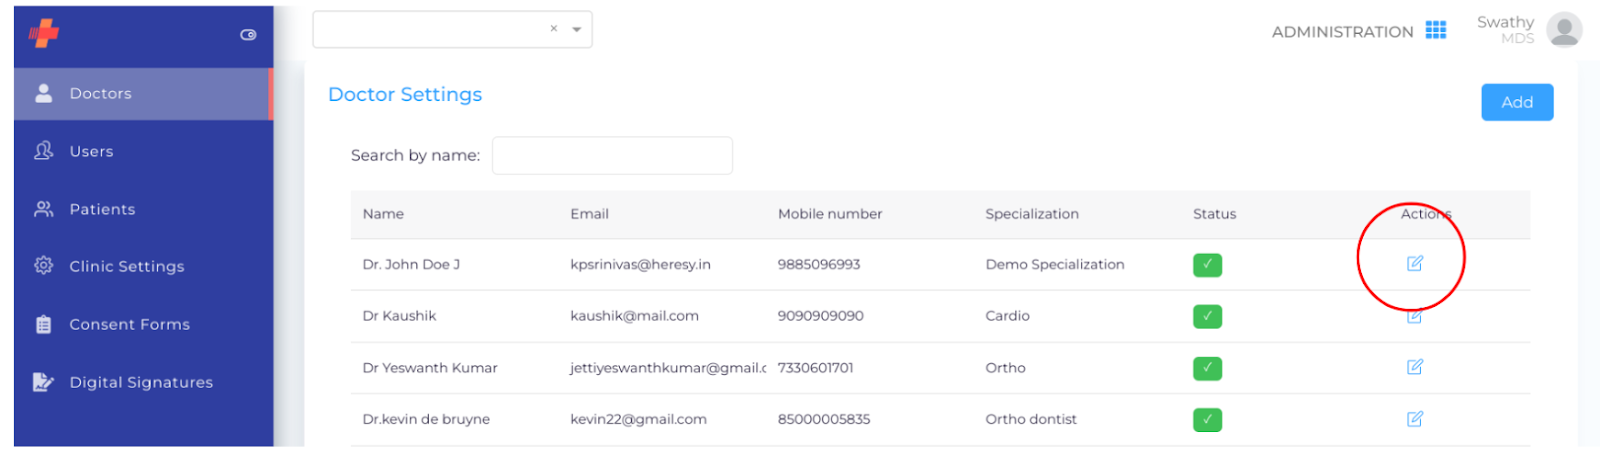
Update the details of the Doctor/User in the form provided.
Click on "Submit" to save the changes made.
Assign User Roles
User roles to help define and control the level of access and permissions that different users have within a system. This helps to ensure the security and integrity of sensitive data, prevent unauthorized access or modifications to critical information, and allows for easier troubleshooting and auditing of the system.
Role types:
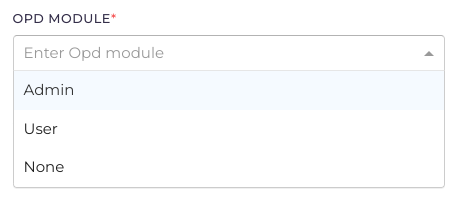
Admins have full control over a module, including creating, editing, and deleting information. Users can view the module but have no decision-making abilities.
None role hides the module from the user.
Locate the User's profile from the list view provided.
Click on the "Edit" button under the "Actions" column.
Click on "Control Settings."

Assign roles to the User for the different modules in HMS.
Click on "Submit" to save the changes made.
Note: The admin cannot change his roles. This panel will only be accessible to the owner. If the owner is the admin, then contact the sales team at support@neftx.com for further assistance.
Deactivate User Account
By deactivating the account, the user will no longer be able to log in to their profile or access any patient records, prescription history, or other sensitive information. However, the user's data will still be stored in the system for auditing and compliance purposes.
Deactivating the account is an important step in maintaining the integrity of patient data and ensuring that it is only accessed by authorized personnel.
Click on the "Edit" button under the "Actions" column of the user profile.
Toggle off the "Status" button under "General Settings" in the form provided.

Click on "Submit" to deactivate the User's account.
Note: Deleting a user is not possible because it can affect the records and data created by them.
The patient section in the admin module is where all the patients created in the OPD/IPD module are saved. Each patient is assigned a unique ID and is displayed as a list with pagination.
To add a patient, click on the add button and fill in the details in the slider that appears, then click save.

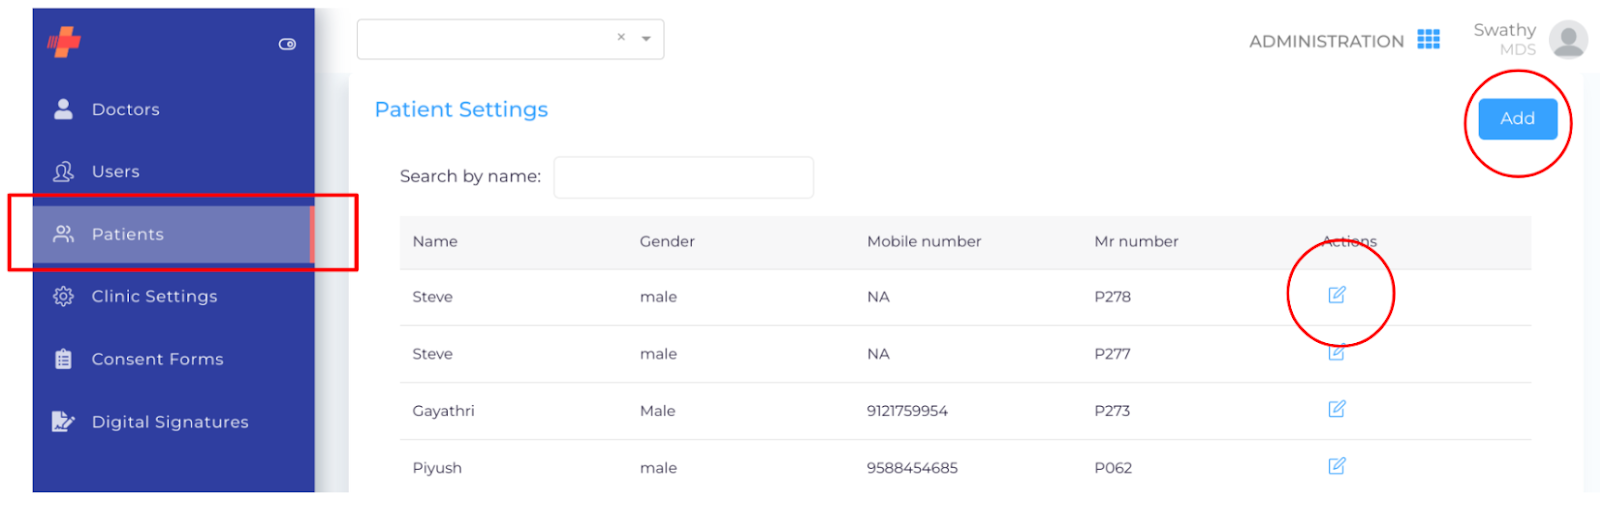
To edit a patient's details, click on the edit icon under actions and make the necessary changes in the slider, then click save.
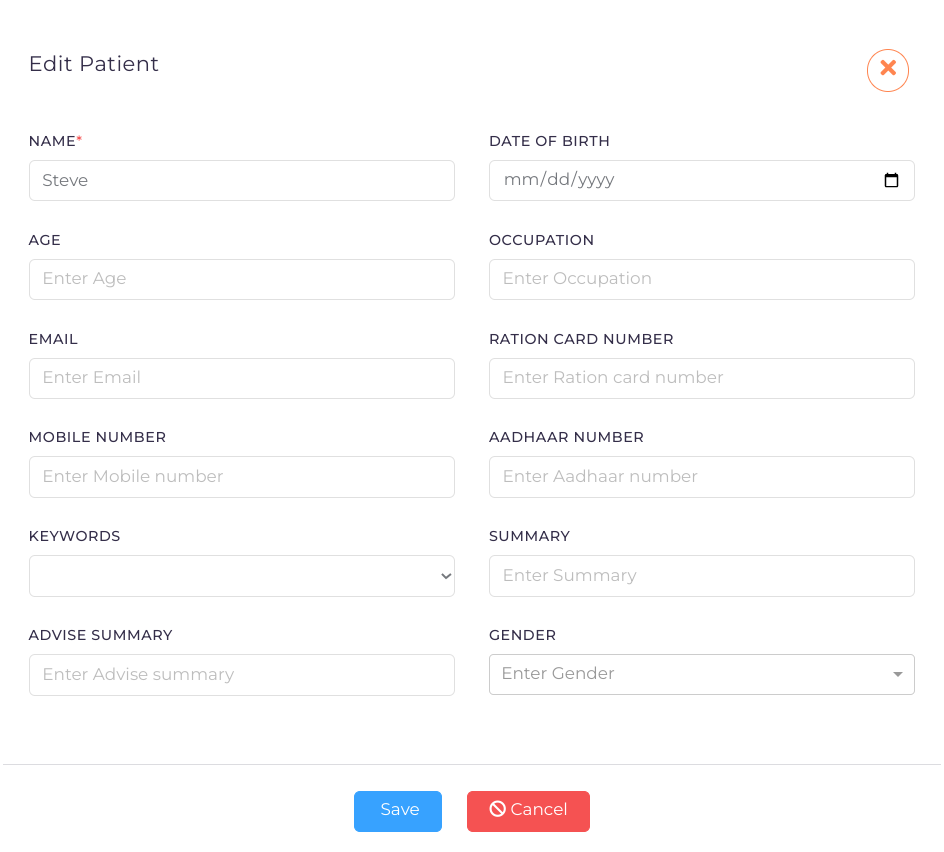
When editing a patient's details, there are three additional fields available: Aadhar number, ration card number, and occupation, which can be useful if the patient is admitted to the hospital (In-patient).
Clinic settings is a section in NeftX that allows users to manage various aspects related to their clinic or hospital, such as hospital details, contact information, operating hours, and print settings. By providing accurate and up-to-date information in this module, users can improve their online presence and search engine optimization (SEO), which can help potential patients find their clinic more easily. This section provides an all-in-one platform for managing and customizing the settings of the clinic or hospital.

Clinic settings have 6 sub-sections in them.
- Hospital details
- Contact
- Info
- Timings
- Print settings
- Pharmacy details
Hospital Details:
The hospital details section is a part of the Neftx Clinic Settings section. This section allows the user to add important details about their organization, such as logo, name, GSTIN, specialty, and more. Adding these details can help improve the website's visibility in search engine results by providing keywords for organic SEO.

In addition, users can add a Google Analytics tag to track their website analytics and a Whatsapp number for easy communication with clients. The tagline and About section can also be added, which will be reflected on the website's footer and OG content when sharing the website link, respectively.
Overall, the Hospital details section is a crucial aspect of the Neftx Clinic Settings module that can help enhance the organization's online presence and improve client communication.
Contact:
The Contact section is an important aspect of your website's SEO and geolocation tracking. By filling out this section, you provide structured data that search engines can use to understand your location-based information, which can improve your search results.
This section includes important fields such as your address, locality, city, pin code, phone number, email address, state, and map. To edit this section, simply click on the edit icon on the top right corner, fill in the required fields, and click submit to save.

Info:
This section allows for the addition of social media links, additional links such as research papers or achievements, and links to any awards received by the organization.
Adding information to the "Info" section can help improve the organization's online presence and search engine optimization (SEO).
The social media links will be displayed in the website footer for patients to reference, while the additional links and awards will not be visible on the website but can contribute to improved SEO.
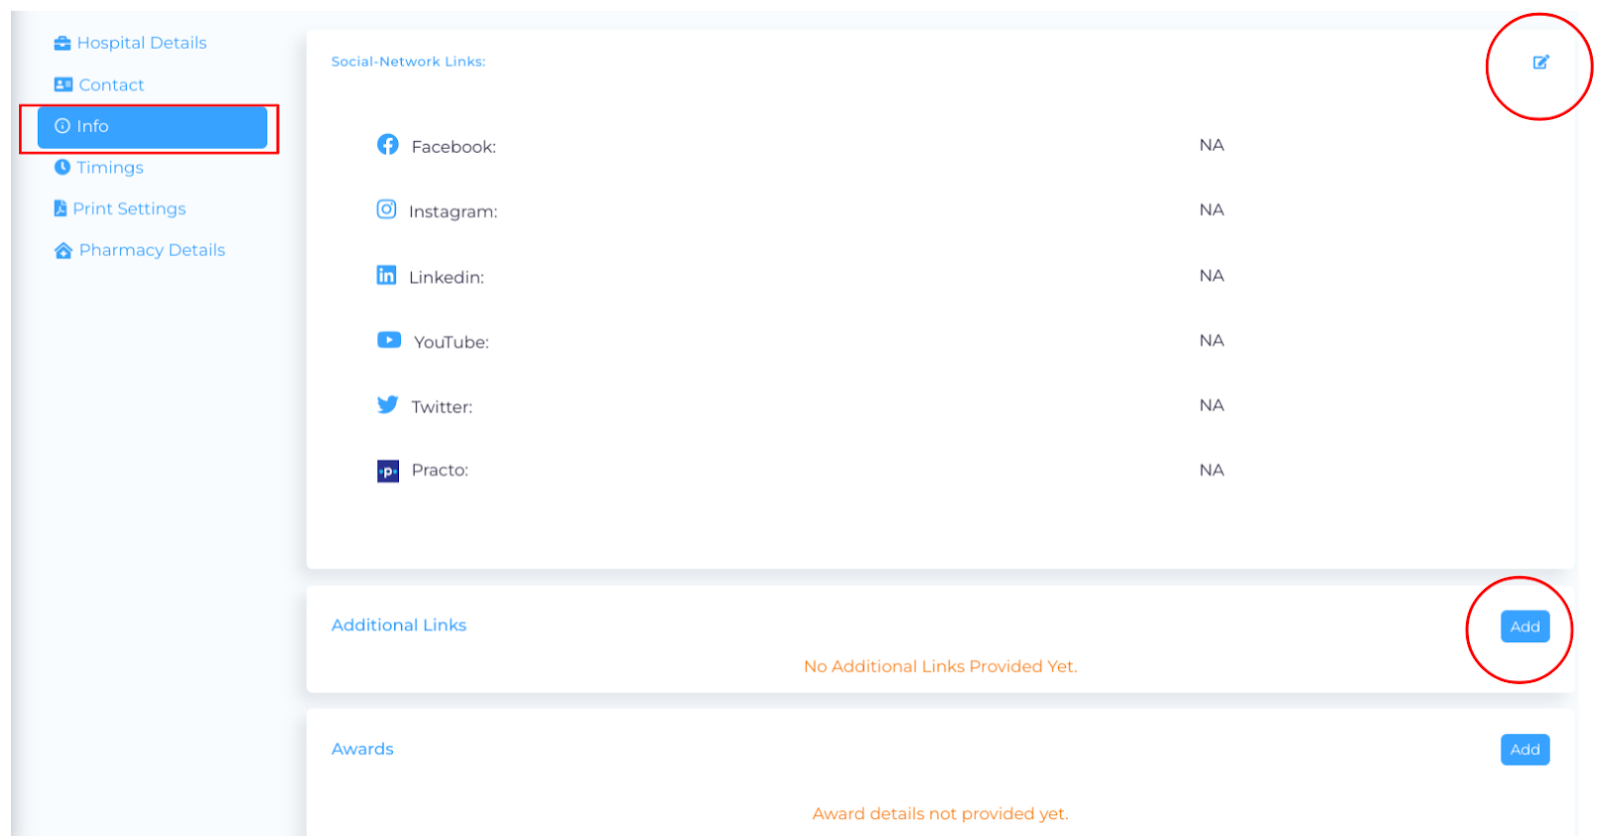
To add or edit links, simply click on the corresponding icon in the top right corner of the section, paste the links, and submit to save the changes.
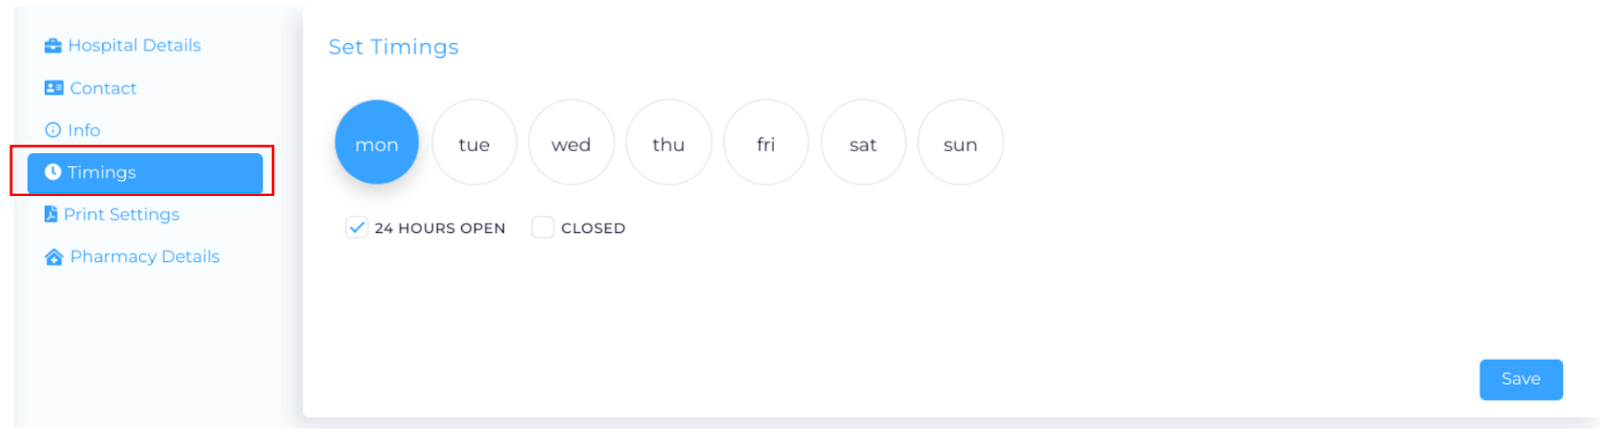
Timings:
The Timings section is where you can add your organization's weekly schedule and availability. This is crucial for patients who book appointments through your website, as it allows them to make informed decisions based on available time slots. This feature enhances patient satisfaction and reduces the possibility of conflicts in appointments.
Print Settings:
The print settings section offers 7 different customizable templates for the organization to use for their consultation, lab reports, prescriptions, bills, IPD bills, IPD final reports, pharmacy, and consent forms. By adding or editing these templates, the organization can tailor their printed documents to their specific needs.
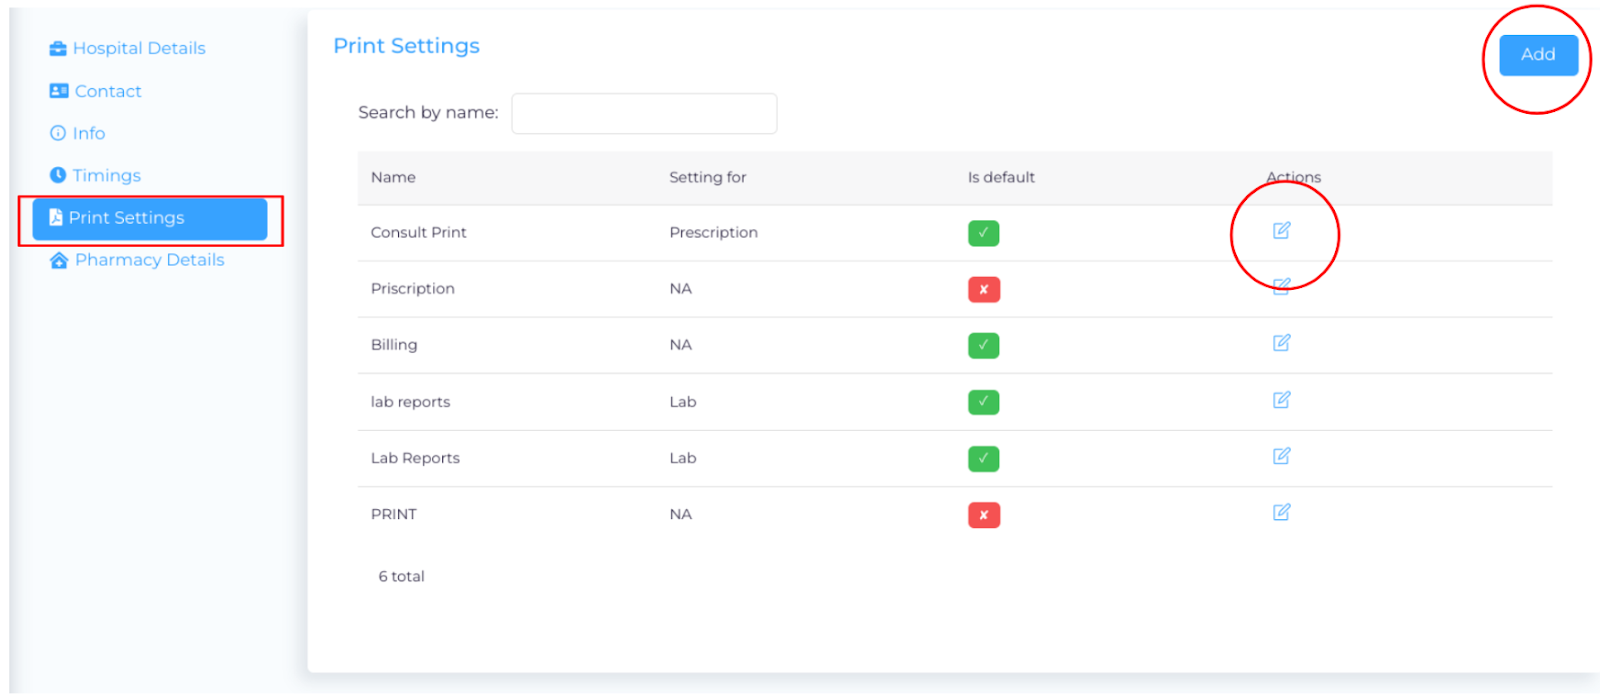
The "is default" toggle option makes it easy to set a default template for all printable documents.
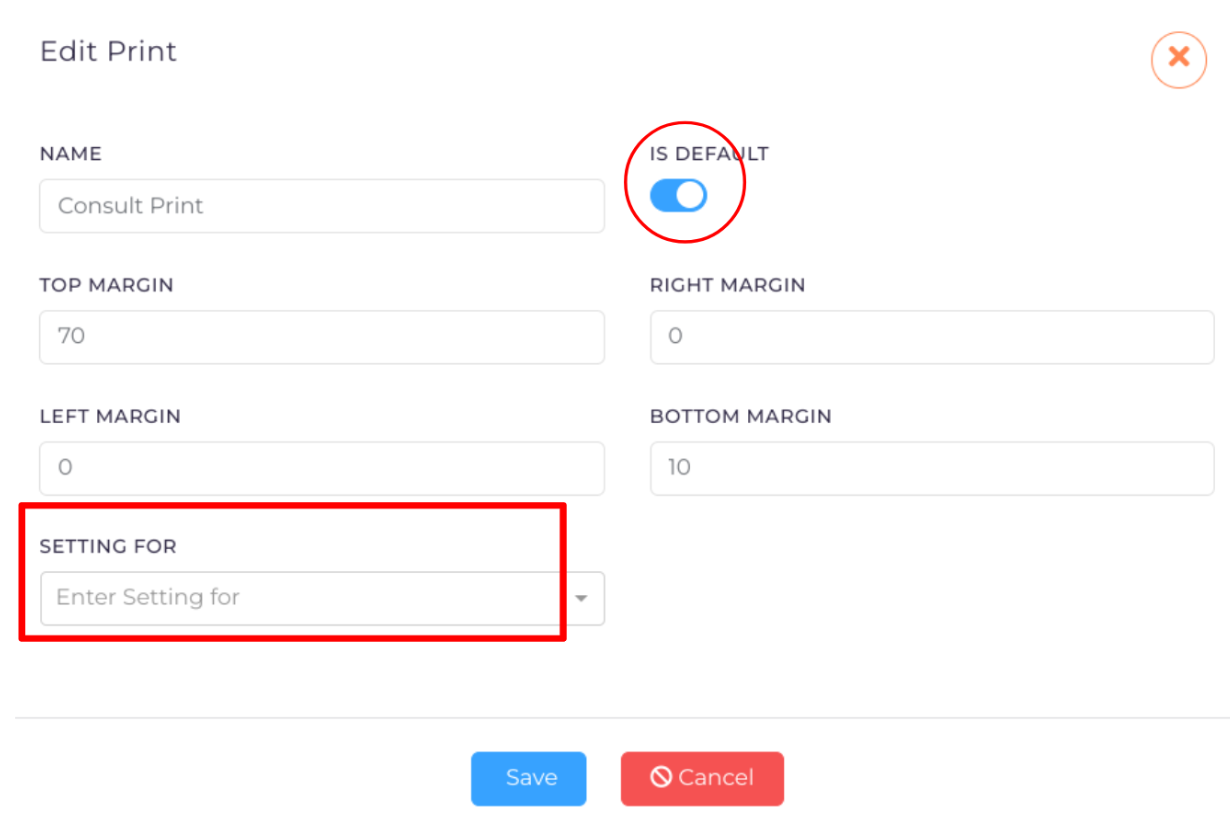
Additionally, the margins field can be used to adjust the margins based on the organization's letterhead. Simply enter the margin measurements in millimeters (mm) and the content will not be filled in these spaces. To add or edit the print settings, simply click on the corresponding button and fill in the required fields.
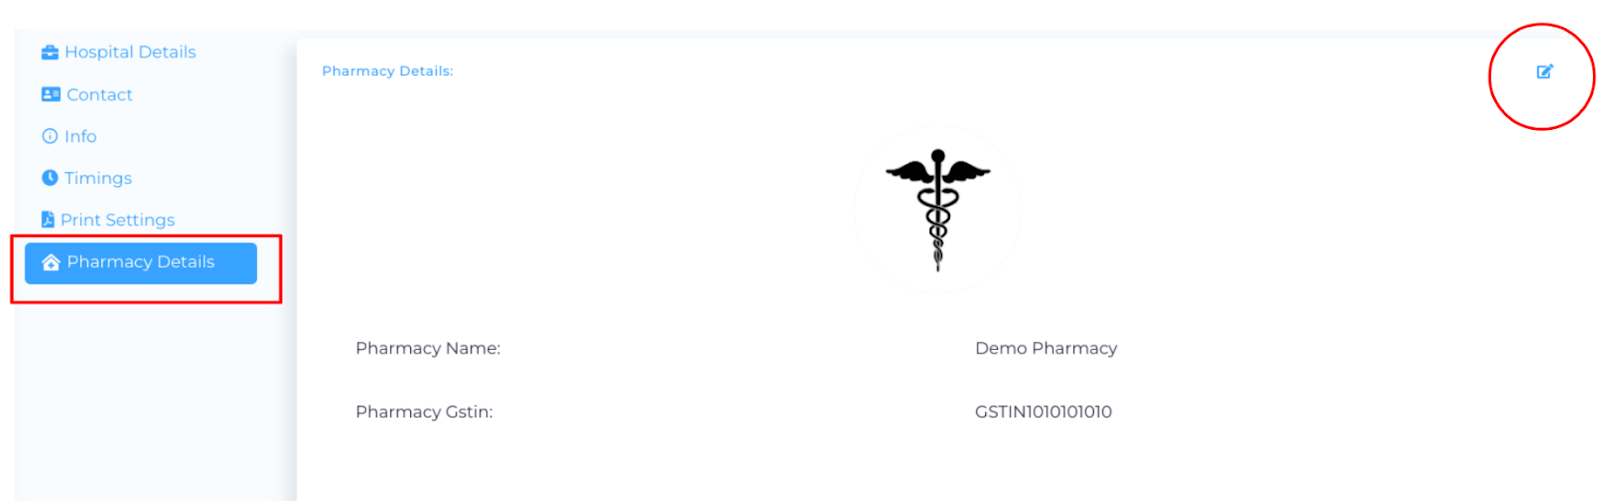
Pharmacy Details:
The pharmacy section is an important aspect of any healthcare organization. It allows you to specify whether your pharmacy is internal or external to your clinic or hospital. This is important for billing purposes.
It helps keep track of stocks and bills raised and provides a separate entity for taxation purposes. The pharmacy can be treated as a different entity to keep the organization away from this responsibility.
In this section, the pharmacy logo, pharmacy name, and pharmacy GSTIN can be added.
To make changes, simply click on the edit button in the top right corner, add the details, and click on the submit button to save the changes.
By providing a separate login and access to only the pharmacy module, the pharmacy can bill separately and help the organization maintain accurate records of its finances.
Consent forms are an important aspect of medical procedures, requiring a lot of time and effort to prepare. But our software has a smart solution that makes creating and managing these forms easy. With our consent form management feature, administrators can create templates with special tags such as #PATIENTNAME that will be replaced by the actual patient name when printed. This ensures that all necessary details are included and no time is wasted in preparing the forms.
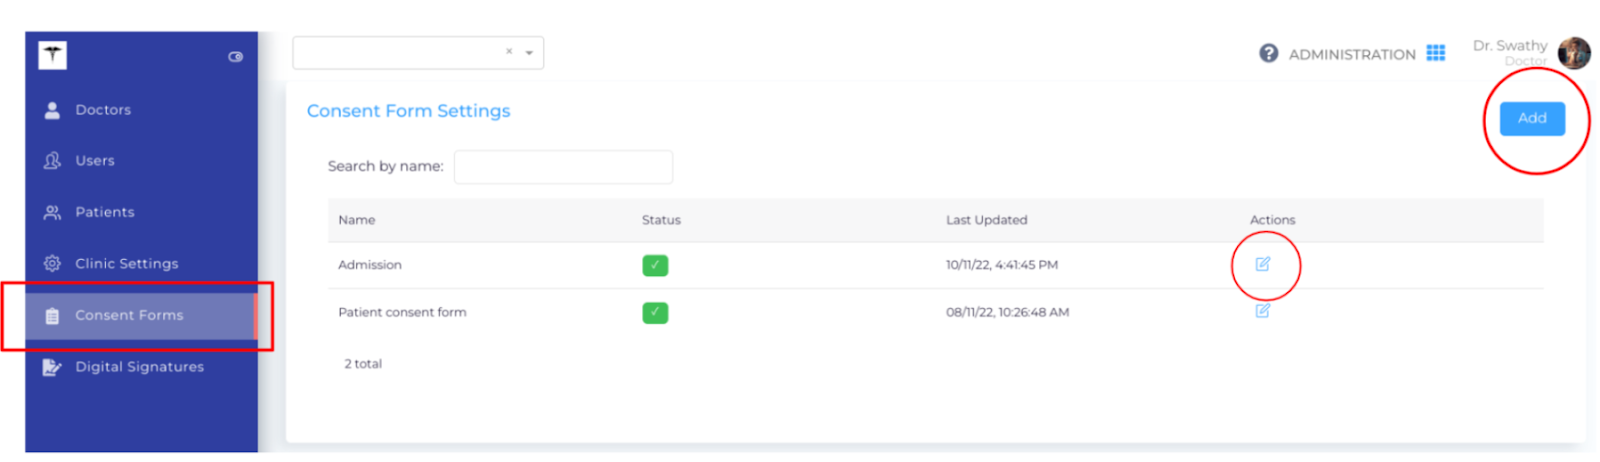
For IPD consent forms, tags such as #GUARDIANNAME, #DOCTORNAME, #HOSPITALNAME, #REASON, and #PRACTICENAME can be added and automatically replaced. To add a new consent form, simply click on the "Add" button, fill in the details, toggle the status to "available," and save.
The consent forms can be accessed from the IPD Module >> Manage >> projection >> print consent form. With our consent form management feature, doctors can easily obtain the necessary consent from patients while saving time and effort.
Digital signatures are a key feature of the lab module, allowing for a faster and more streamlined process of generating lab reports. This feature is designed to save time for the authorized signatory. With digital signatures, the person who audits the reports or the admin can easily add the signature to the relevant investigation. When generating the final print, the signature will automatically be reflected on the printout.
Adding a signature is simple - just click on the add signature button located in the top right corner, then click on the edit icon to upload the signature.
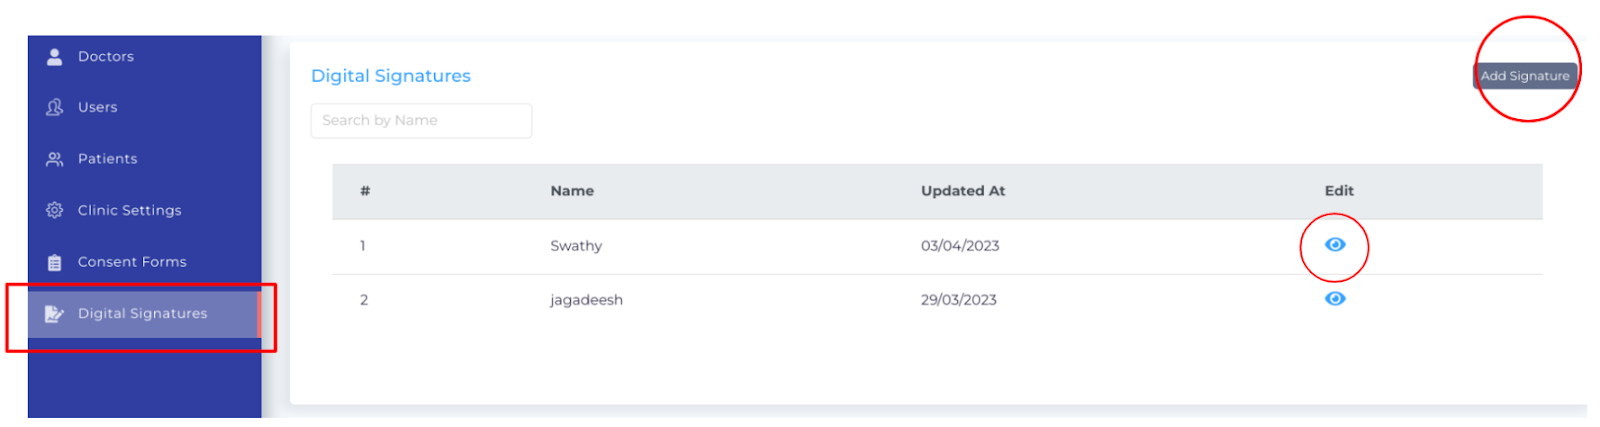
Finally, add the name of the concerned person and save the changes. With this feature, lab reports can be generated with ease and efficiency.
